
Fixing defects
This page describes how a developer handles an assigned defect, from opening the task to checking the correction at the next analysis.
For the meaning of each field mentioned here, see Defect Details and Task Details.
These procedures use Visual Expert Web. For what differs in Visual Expert Desktop, see Defect & Task Management in Visual Expert Desktop.
On this page
- How a defect and its task move
- Open a task assigned to you
- Start work on a task
- Open the related defect
- Examine the defect
- Measure the impact of a correction before making it
- Get a suggested correction
- Mark the defect as fixed
- Check the correction at the next analysis
- Close the task
How a defect and its task move
| Action | Defect | Task |
|---|---|---|
| The reporter assigns the defect | Open | Open |
| The assignee starts work | Open | In Progress |
| The assignee marks the defect as fixed | Pending Validation | In Progress |
| The next analysis no longer detects the defect | Resolved | In Progress |
| The assignee completes the task | Resolved | Completed |
The value in bold is the one that changes. Every change is made by a user, except Resolved, which Visual Expert sets at the next analysis.
Open a task assigned to you
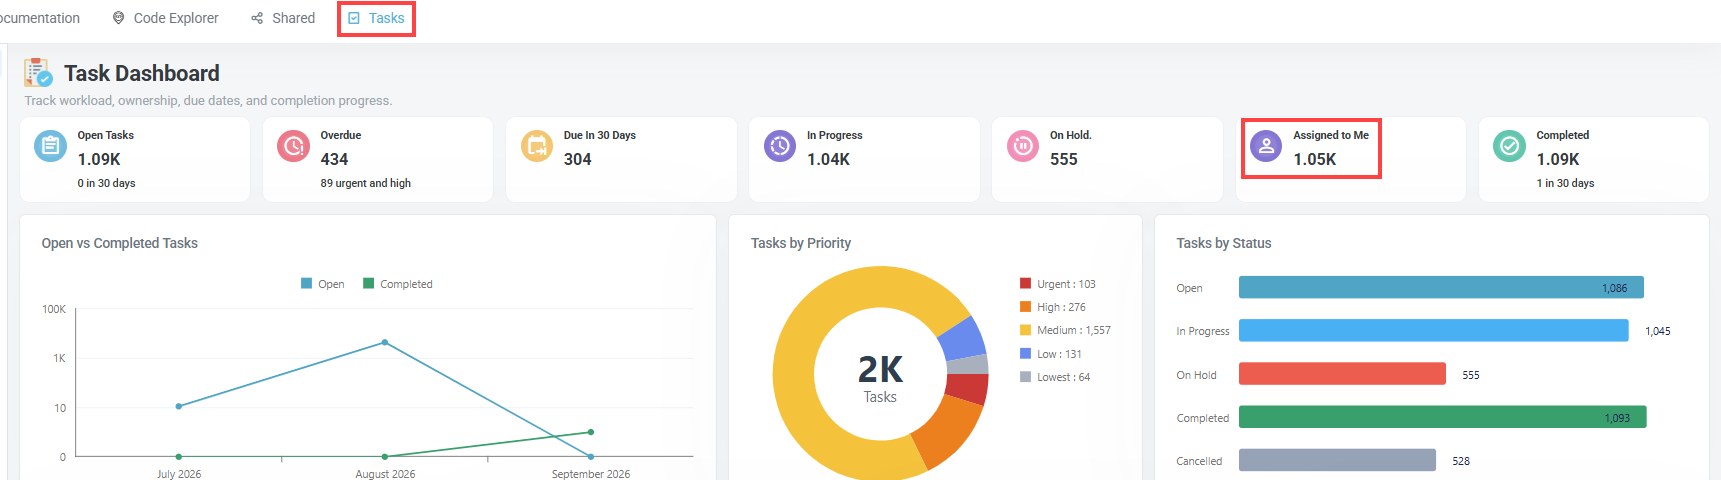
- Click the Tasks tab. The Task Dashboard opens.
- Click the Assigned to Me counter. The task list opens, limited to the tasks assigned to you.
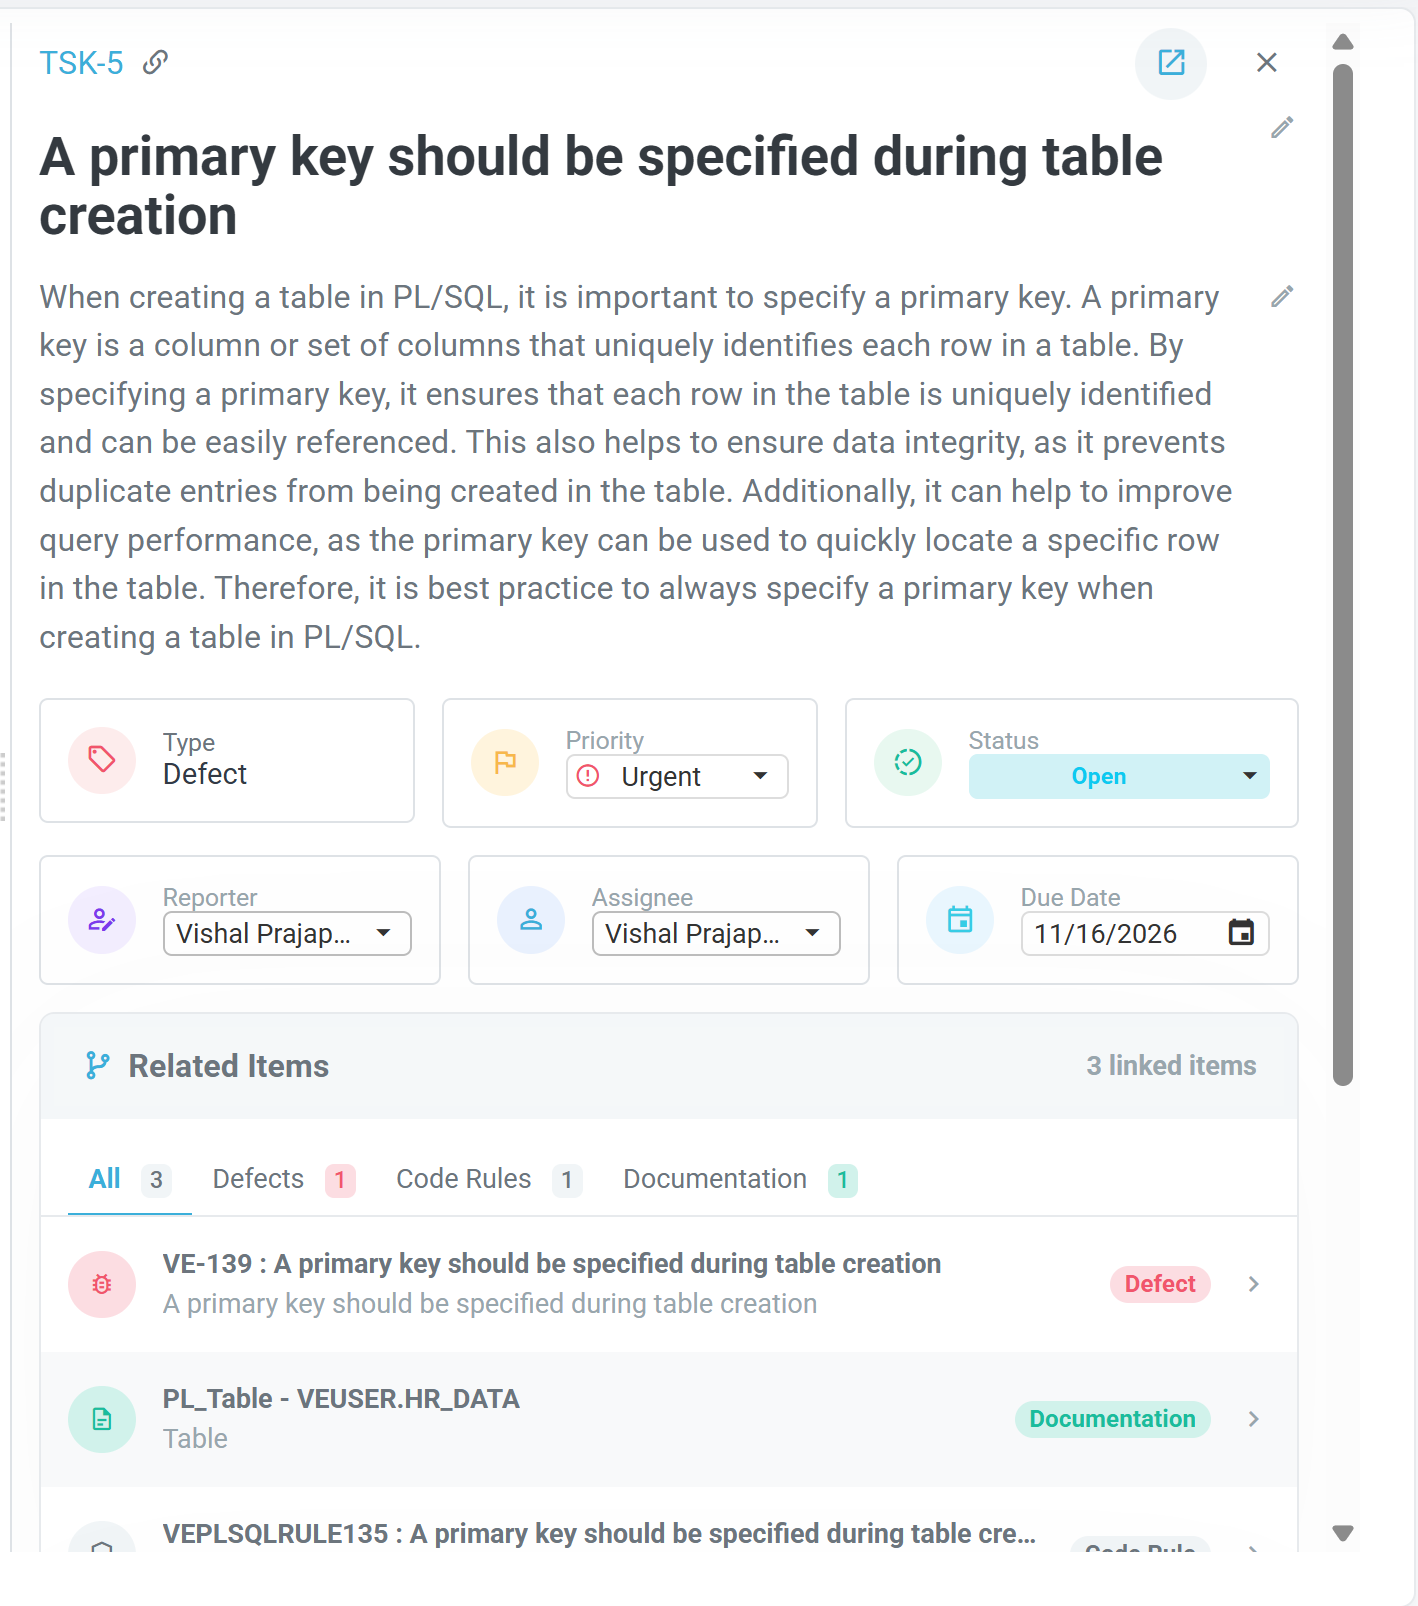
- Click a task. It opens in a side panel, with its description, its status and the items it is linked to.
Start work on a task
A task reaches you with the status Open. Assignment is described in Triaging defects.
- In the task, select In Progress in the Status dropdown. The change is applied immediately.
Priority and Due Date are changed the same way.
You can also change the status from the task list: select the task with its checkbox, then click Status in the action bar.
Open the related defect
The finding stays on the defect: its occurrences, its source code and its rule.
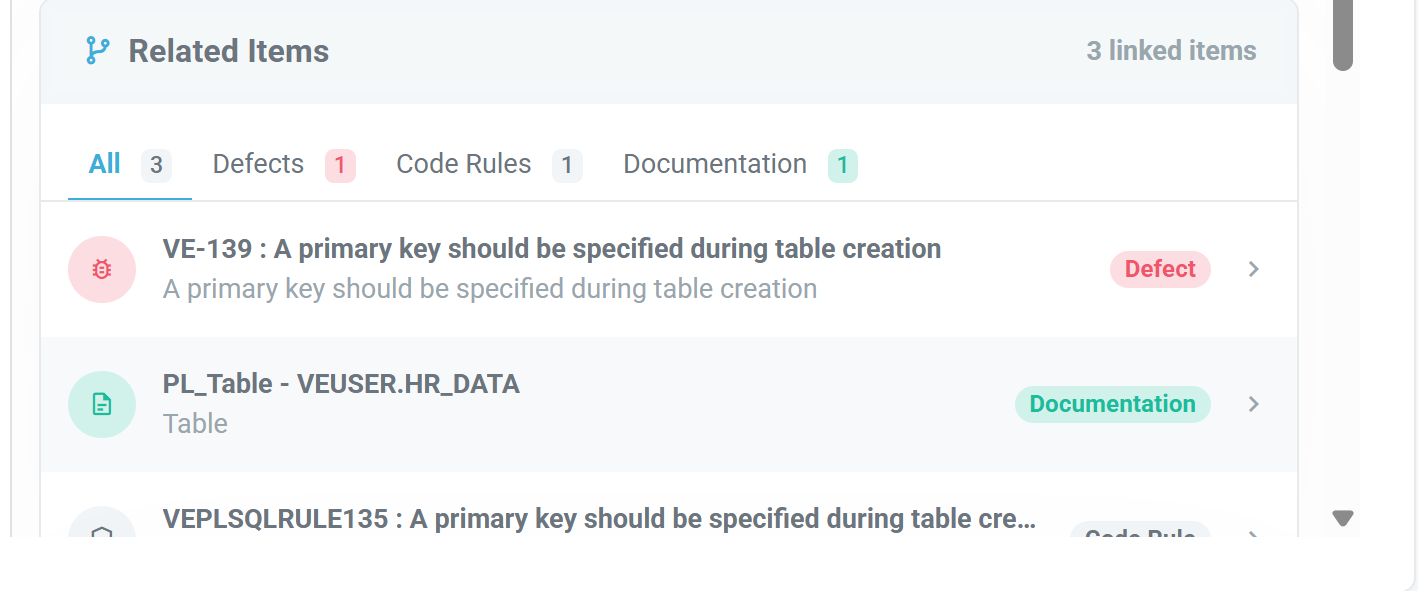
- In the task, go to Related Items.
- Click the defect entry to open the defect.
On the defect, click View Task to go back.
Examine the defect
A defect may contain several occurrences of the same rule violation. A status applies to the whole defect, not to a single occurrence. Review them all before changing the status of the defect.
- Look at the Occurrences table (A). It lists every place where the rule is broken, with its line number and the beginning of the statement.
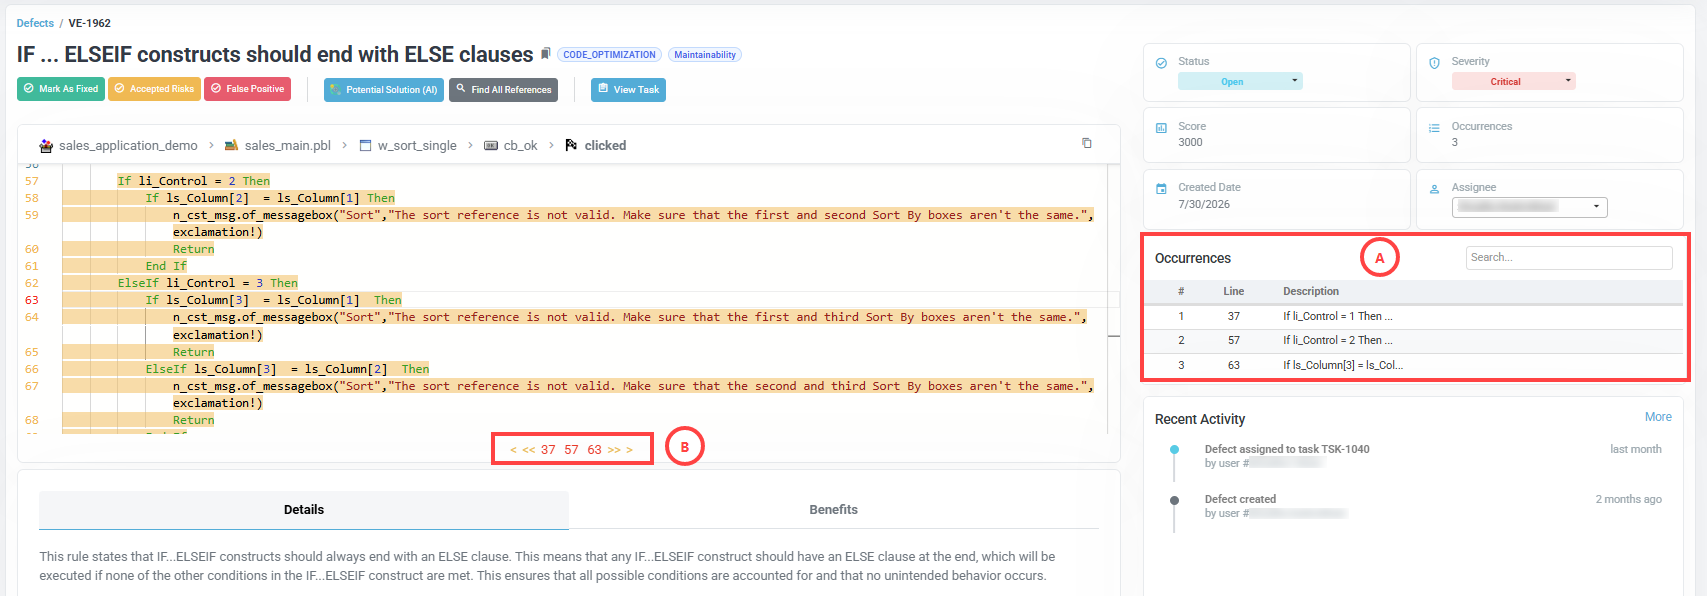
- Click an occurrence. The source code viewer moves to that line and highlights it.
You can also use the navigation bar under the code (B) to move between occurrences. - Read the Details tab for the reason the defect was detected, its potential impact and the recommended corrective actions.

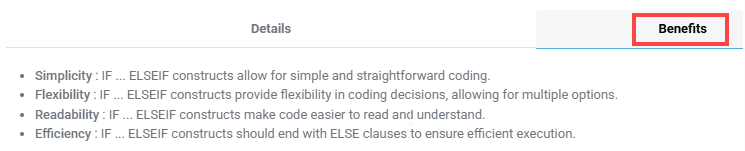
- Read the Benefits tab to see what following the rule brings to the code.
To open the rule documentation, click the Code Rule entry in Related Items on the task.
Measure the impact of a correction before making it
A correction can affect code outside the container where the defect was found.
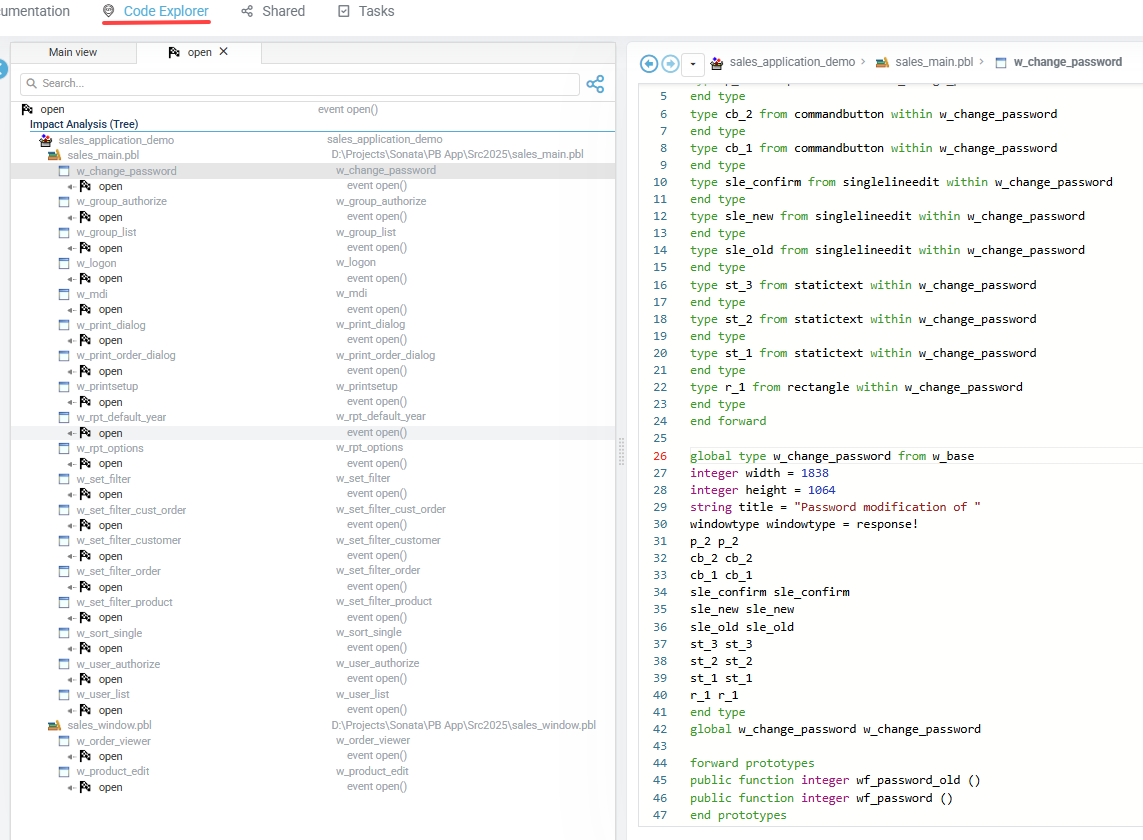
- In the defect view, click Find All References.

- The Code Explorer tab opens on an Impact Analysis tree. It lists the objects that reference the affected one.
- Click an object in the tree to see its source on the right.
If the correction turns out to be disproportionate, the defect can be recorded as an accepted risk instead - see Triaging defects.
Get a suggested correction
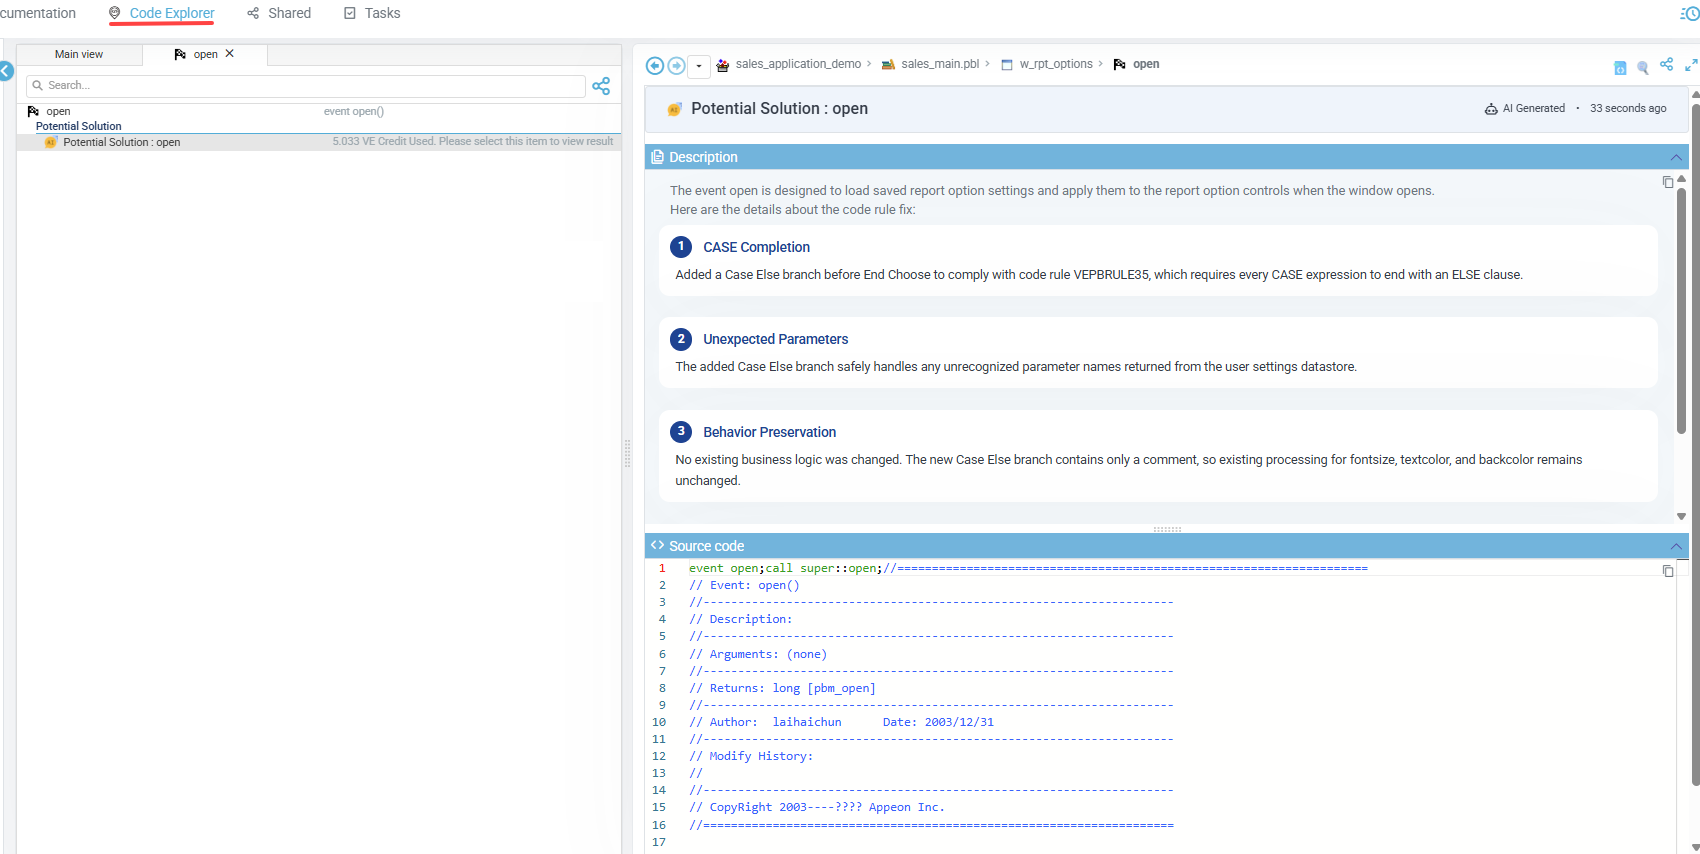
- In the defect view, click Potential Solution (AI).

- Read the proposed correction and apply it yourself. Visual Expert does not change your code.
Mark the defect as fixed
Mark As Fixed is a button in the action bar of the defect, next to Accepted Risks and False Positive.
- Once the code is changed, open the defect.
- Click Mark As Fixed. The defect moves to Pending Validation.

Visual Expert checks the defect again at the next analysis.
Check the correction at the next analysis
- After the next analysis, open the Code Inspection dashboard and check the analysis date.
- Click the Resolved counter to see the defects the analysis no longer detects.
If your defect is listed, the correction is confirmed and the defect is Resolved.
If it is not listed, it is still being detected. Open it and check whether the correction covers every occurrence.
Close the task
Complete the task as soon as you have made the change, or wait until the next analysis has confirmed the correction.
- Open the task.
- Select Completed in the Status dropdown. The change is applied immediately.
- Add a closing comment in Comments if it helps whoever reads the task later.
From the task list, select the task with its checkbox, click Status in the action bar and select Completed.