
Triaging defects
This page describes how to review the defects reported by an analysis, decide which ones require action, and assign them to developers.
For the meaning of each figure and column mentioned here, see Defect Dashboard and Defect List.
These procedures use Visual Expert Web. For what differs in Visual Expert Desktop, see Defect & Task Management in Visual Expert Desktop.
On this page
- See the state of the application after an analysis
- Find the defects added since the last analysis
- Open the defects behind a dashboard figure
- Narrow a defect list
- Find the defects of an object from its documentation page
- Manage defects from a list
- Assign a defect to a developer
- Record a false positive, an accepted risk, or put a defect on hold
- Change the severity of a defect
- Act on several defects at once
See the state of the application after an analysis
- Click the Code Inspection tab (A). The dashboard opens on the results of the most recent analysis.
- Check the analysis date at the top right (B), so you know which run you are looking at.
- Read the counters (C): Active Defects for the total still to deal with, Critical & Major for what usually comes first.
- Read the second line under each counter to see what changed since the previous analysis.
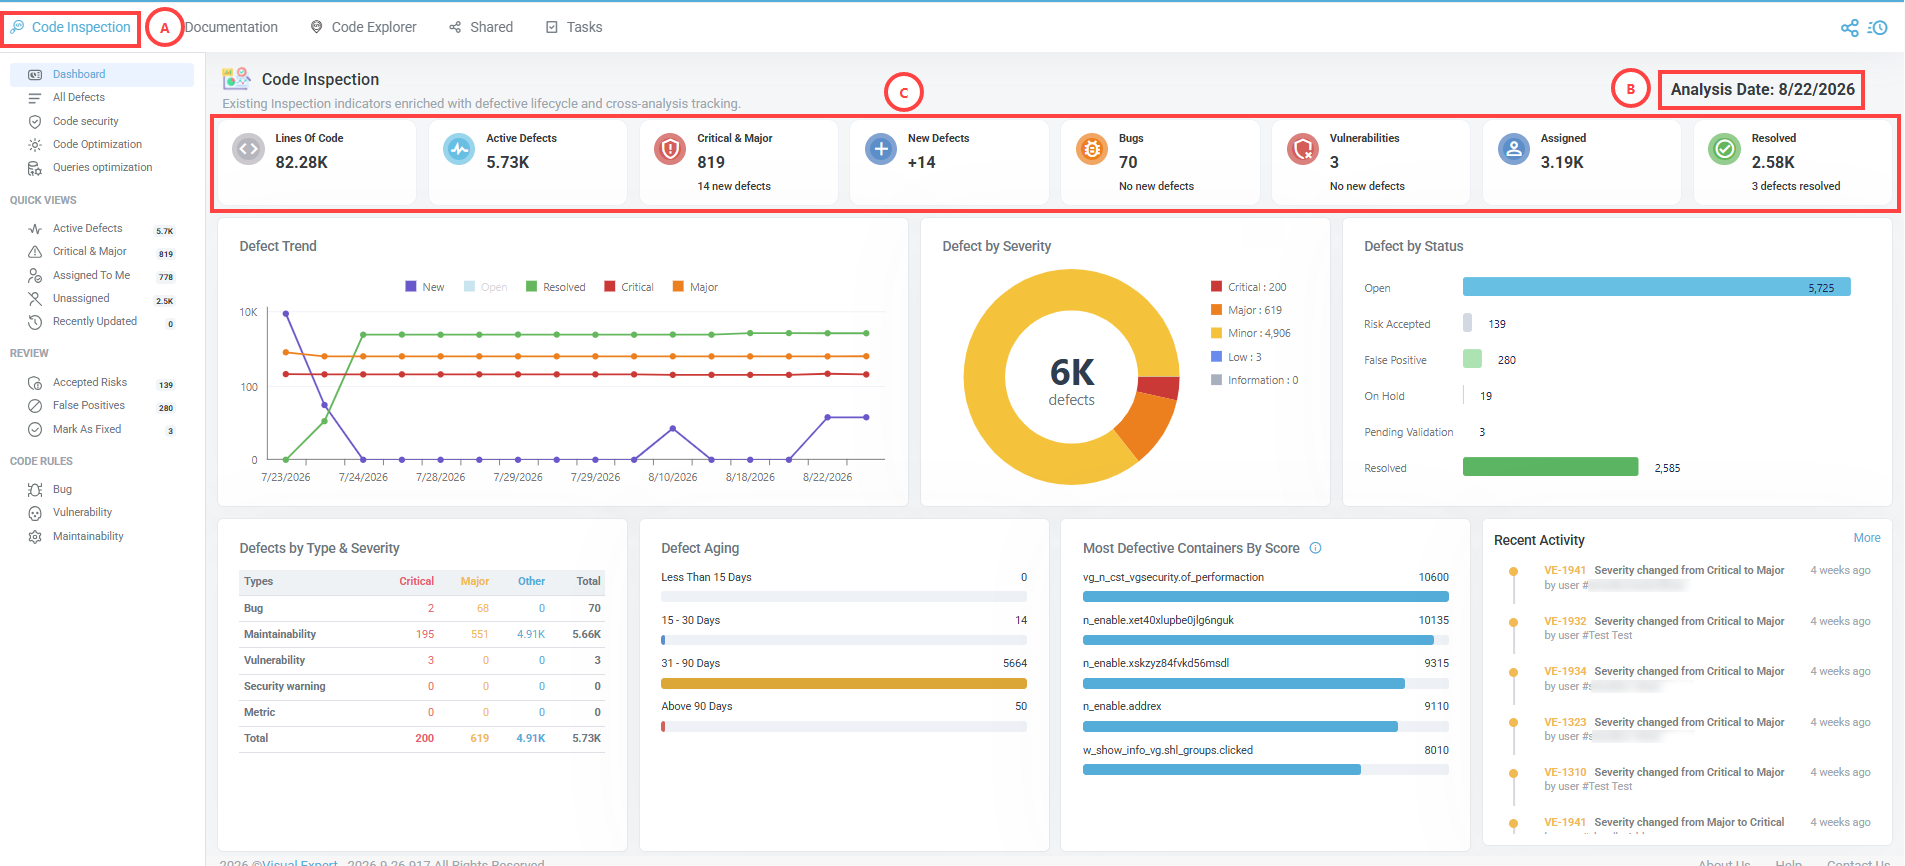
The dashboard always describes the latest analysis. It is not recalculated for an earlier one.
Find the defects added since the last analysis
New Defects counts the defects detected for the first time by the current analysis. Critical & Major, Bugs and Vulnerabilities each display their own count of new defects below the total.

- Click New Defects. The defect list opens, limited to the defects detected for the first time by this analysis.
- Click the Severity column header to sort the list and decide what to look at first.
Open the defects behind a dashboard figure
Every figure on the dashboard is a way into the list.
- Click a counter, a chart segment or a table cell. The defect list opens with the matching filter applied. The filters currently applied are listed at the bottom left of the list.
Narrow a defect list
- In the filter row under the column headers, open the filter of the column you want to use.
- Select the values to keep, or type a search term. The list updates immediately.

- Repeat on other columns to combine criteria - for example a rule and a severity.
- Click Clear Filters in the toolbar to return to the complete list.
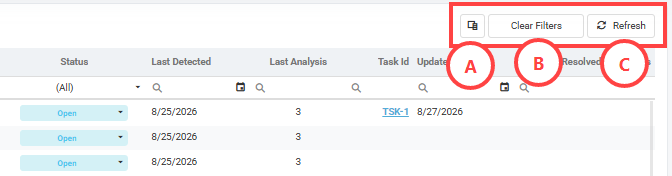
You can choose which columns to display: open the Column Chooser in the toolbar and clear the ones you do not need.
Find the defects of an object from its documentation page
In the Documentation tab, the page of an object lists the code rules it breaks. From there, you can open the defects of each rule.
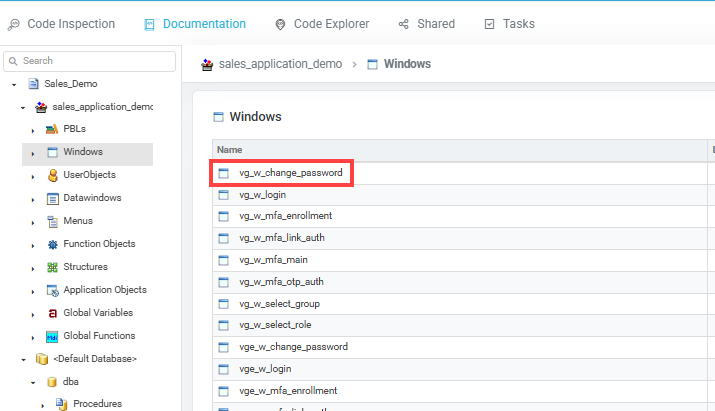
- In the Documentation tab, open the object you are interested in - a window, a function, a procedure.
- In the page summary on the right, click Code Inspections.
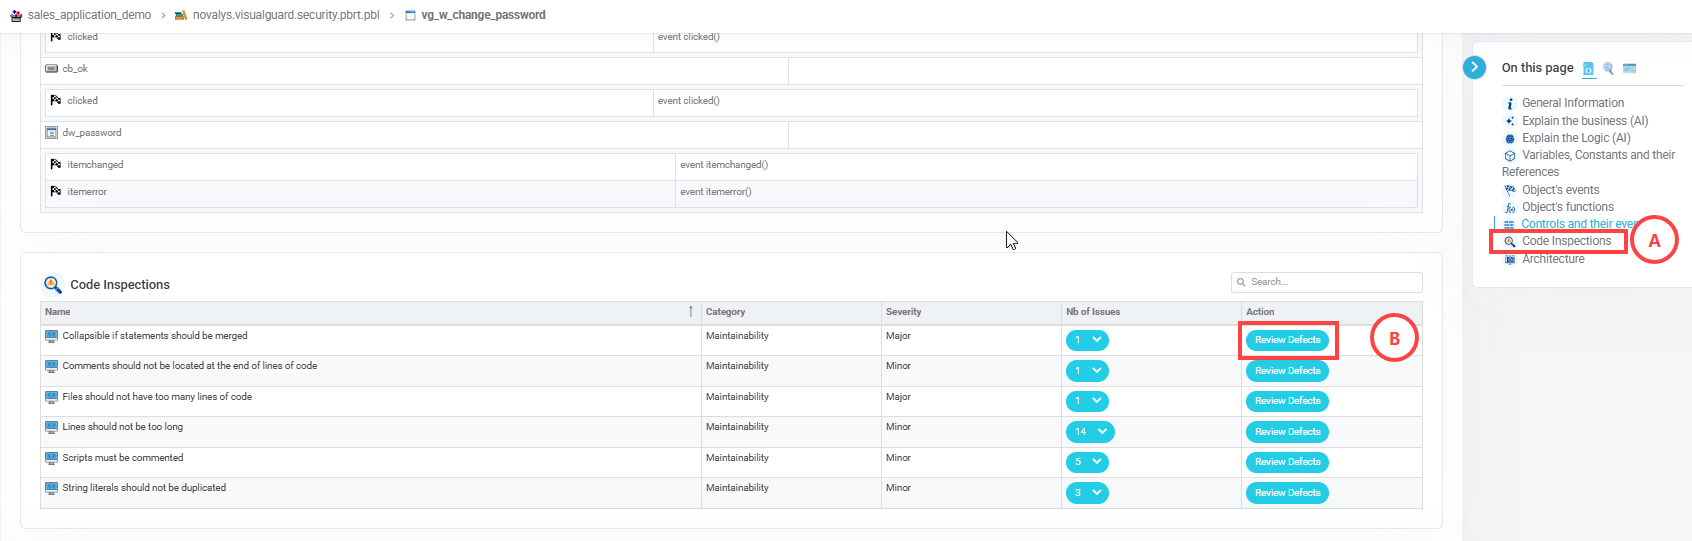
- The Code Inspections section lists the rules broken by this object, with the category, the severity and the number of issues found.
- Click Review Defects on a rule. The defect list opens, filtered on that rule.
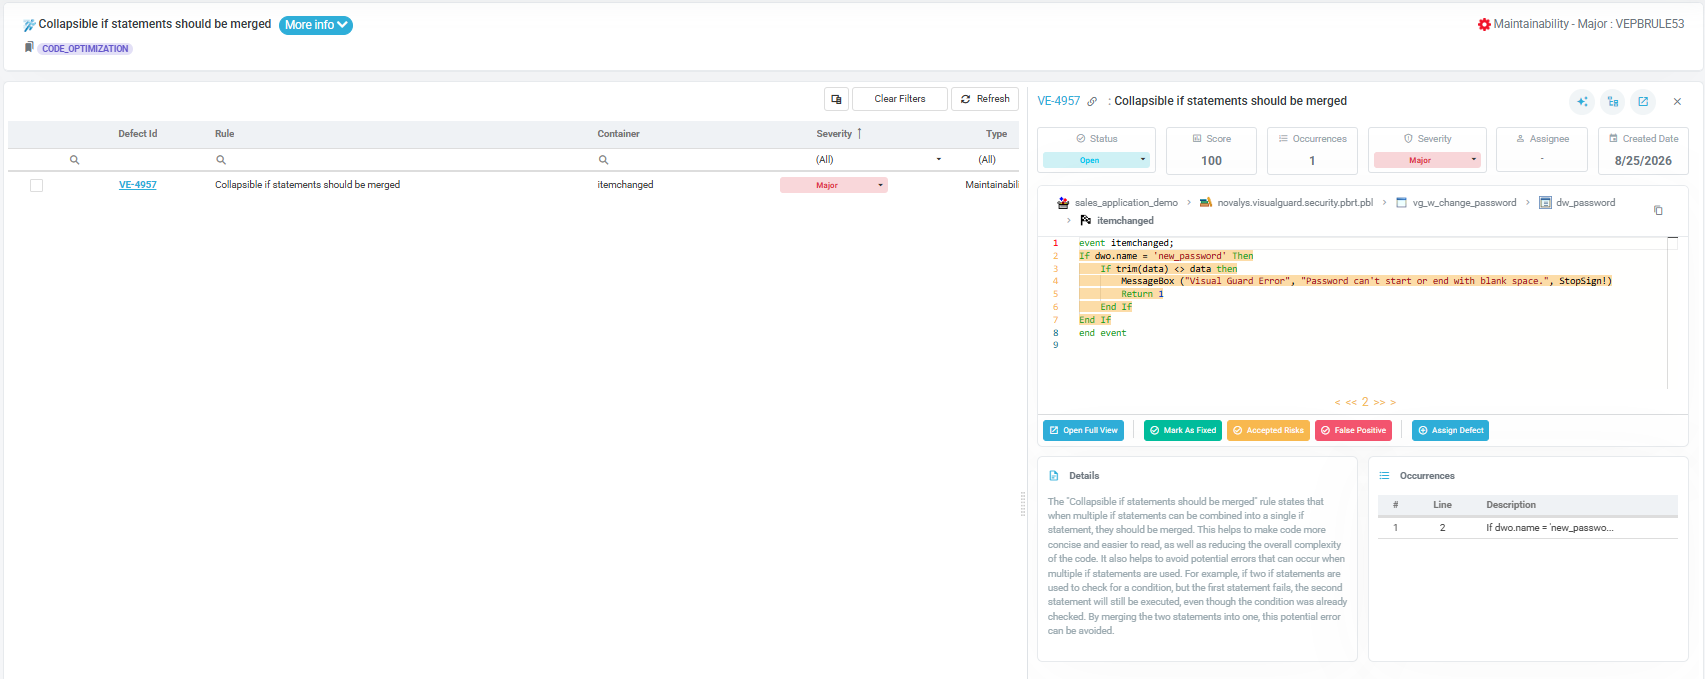
The list is filtered on the rule, not on the object: it shows every container where the rule was broken, and the object you came from is one of them.
Manage defects from a list
The three procedures below – assignment, status and severity – start from the defect list. Status and severity can also be changed from the defect details.
Select the defect with the checkbox at the left of the row (A). The selection action bar appears at the bottom of the list (B). With one defect selected, it offers Assign, Status and Severity. With several, it offers Status and Severity only.
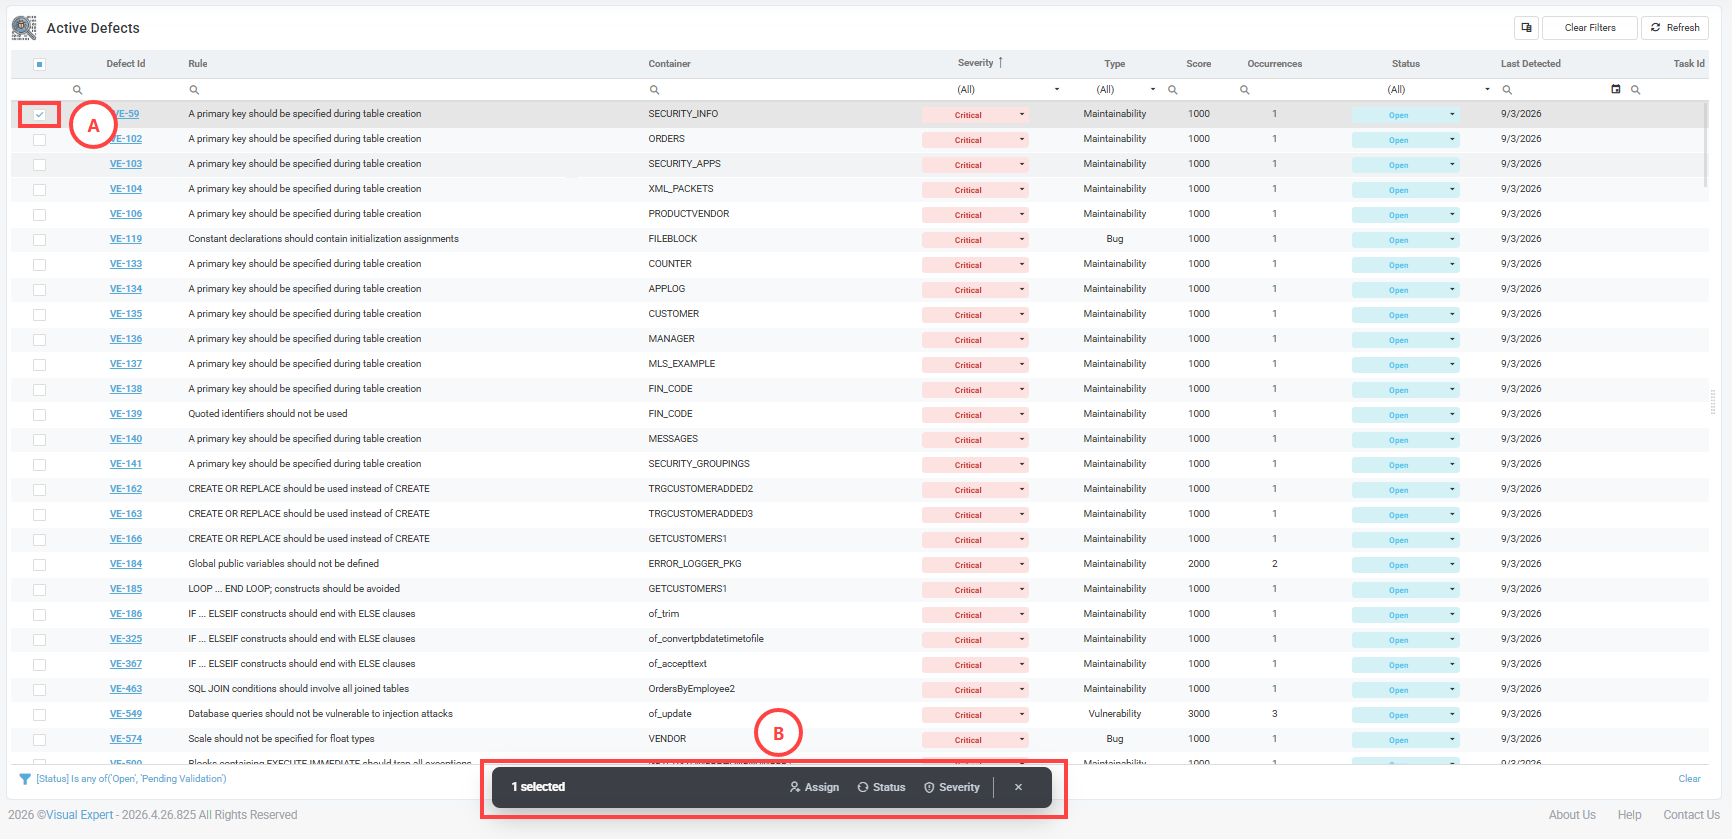
Assign a defect to a developer
Assigning a defect creates a task. A defect is assigned one at a time.
- In the defect list, select a defect with the checkbox at the left of the row.
- Click Assign in the selection action bar to open the Assign Defect window.
- Check the prefilled values: the task name is the defect ID followed by the rule title, the description comes from the rule, the priority from the rule, and you are the reporter. Replace the description if the assignee needs instructions rather than the rule text.
- Choose the assignee and the due date. The due date is prefilled seven days ahead.
- Click Create Task.
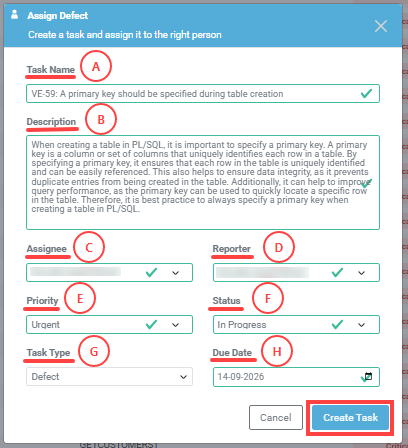
The defect now shows the assignee, and the Assign Defect button becomes View Task. The task is also listed in the Tasks tab.
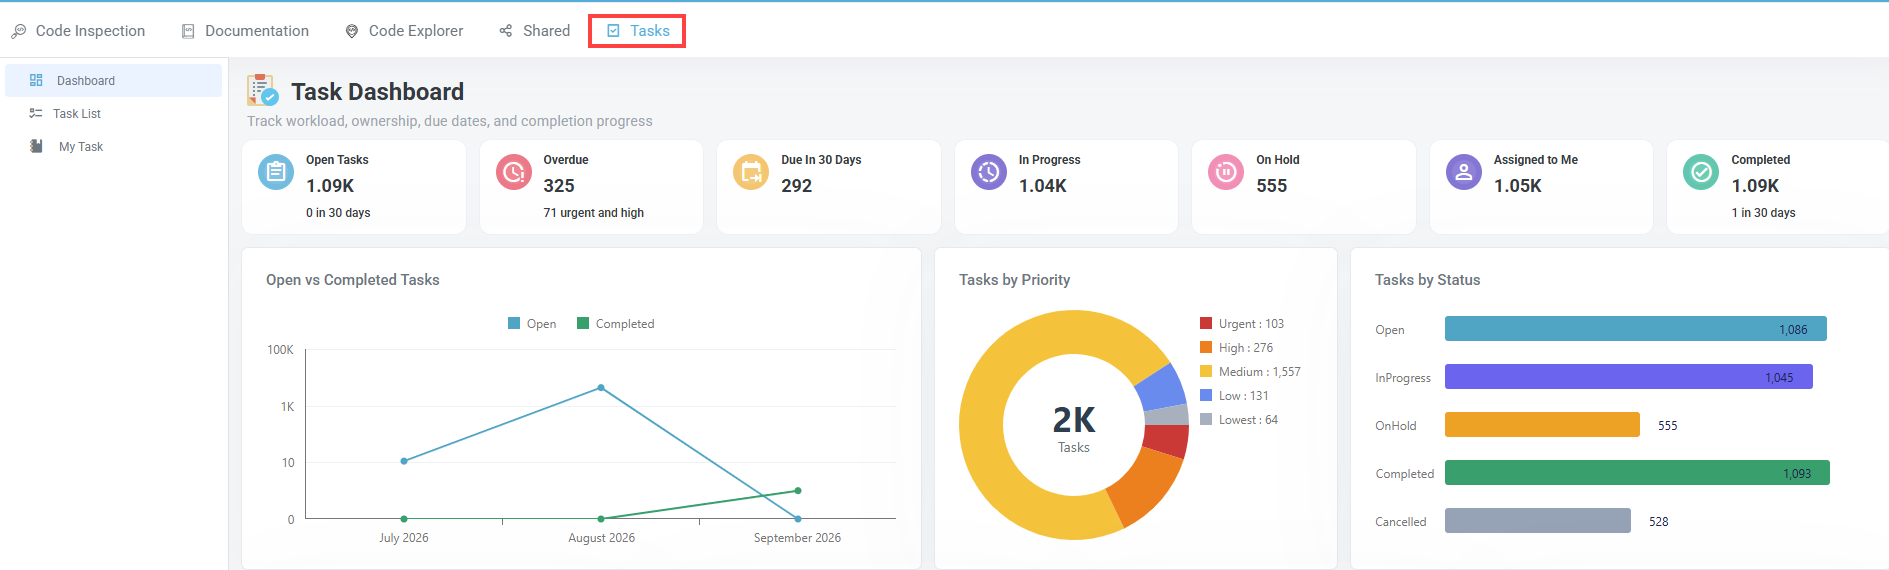
The fields of this window are described one by one in Task Details.
Record a false positive, an accepted risk, or put a defect on hold
Not all defects need to be fixed. Recording the decision removes the defect from the active list while keeping the reason on record.
From the defect list:
- Select the defect with its checkbox.
- Click Status in the action bar. The Change Defect Status window opens.
- In New Status, select False Positive if the rule does not apply here, Risk Accepted if the team knows and accepts the consequence, or On Hold if the decision is only postponed.
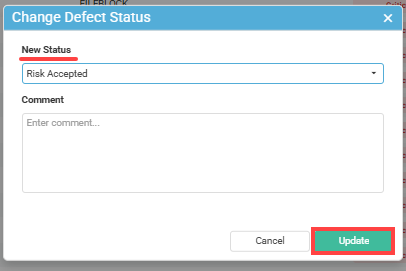
- Enter the reason for the decision in the Comment field.
- Click Update.
From the defect details, select the new value in the Status dropdown. The Change Defect Status window does not open.
The defect leaves the Active Defects view, keeps its history, and the decision appears in Recent Activity.
Change the severity of a defect
The severity comes from the rule. Change it when the rule default does not reflect what this defect means for your application.
From the defect list:
- Select the defect with its checkbox.
- Click Severity in the action bar. The Change Defect Severity window opens.
- In New Severity, select the new level.
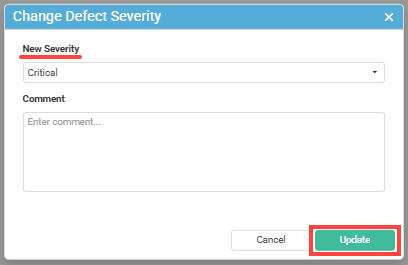
- Add a comment if the change needs explaining, then click Update.
From the defect details, select the new level in the Severity dropdown. The Change Defect Severity window does not open.
Act on several defects at once
Unlike assignment, which is done one defect at a time, status and severity can be applied to a selection of defects.
- Filter the list so that it holds only the defects you want to treat the same way.
- Select them with the checkboxes (A). An action bar appears at the bottom of the list (B), showing how many are selected.
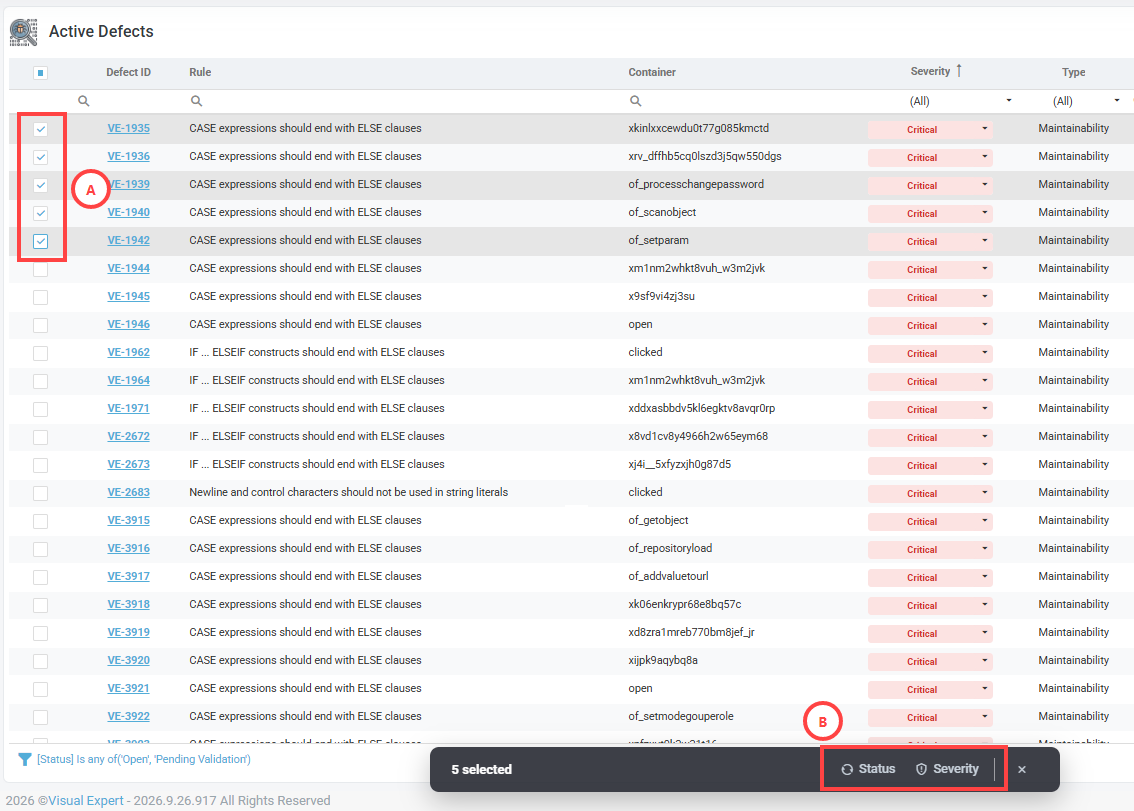
- Click Status or Severity. The same window opens as for a single defect and applies to the whole selection.
- Click on the action bar to clear the selection.