Visual Expert allows you to analyze PL/SQL code directly from your Oracle database. This guide explains how to configure the Visual Expert connection to your Oracle DB using the various Connection Types.
Prerequisites
An Oracle Client must be installed on the user’s system before connecting. The database user must also have access to V$SQL, which contains the performance data. It helps to extract the data and map it back to the VE entity.
Required database permissions:
GRANT SELECT ANY TABLE, SELECT ANY DICTIONARY, UNLIMITED TABLESPACE TO <DBUser>;
GRANT SELECT_CATALOG_ROLE TO <DBUser>;
Case 1: Connection Type - Basic
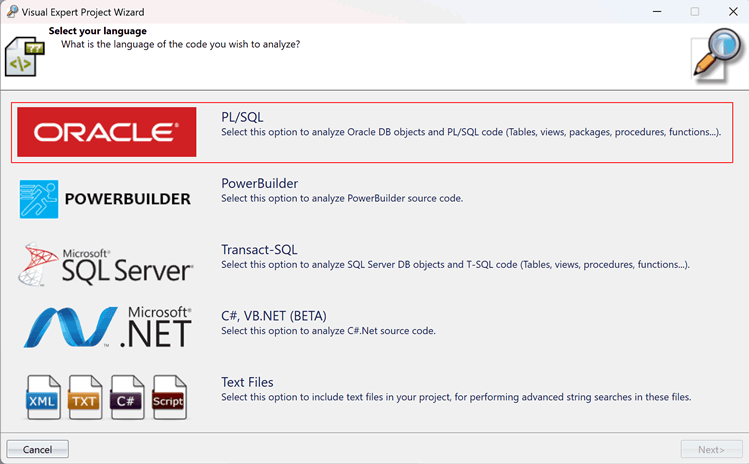
- Open Visual Expert, click [New] on the ribbon menu to open the "Create Project" wizard.
Select [PL/SQL] in the next pop-up.
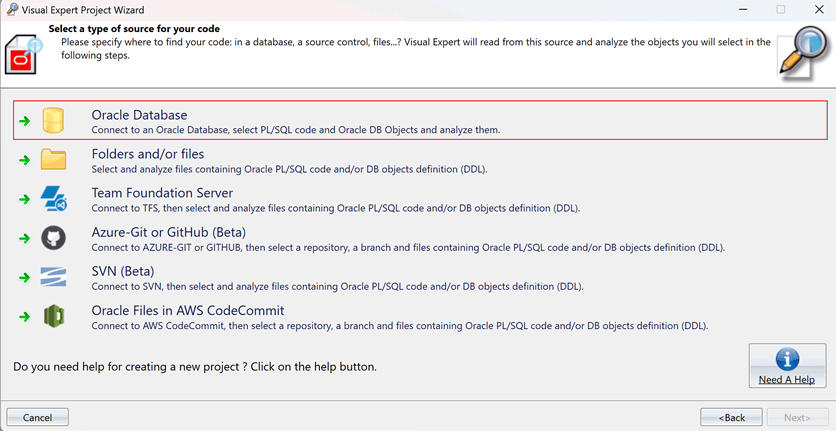
- Click on [Oracle Database] on the Oracle DB connection page.
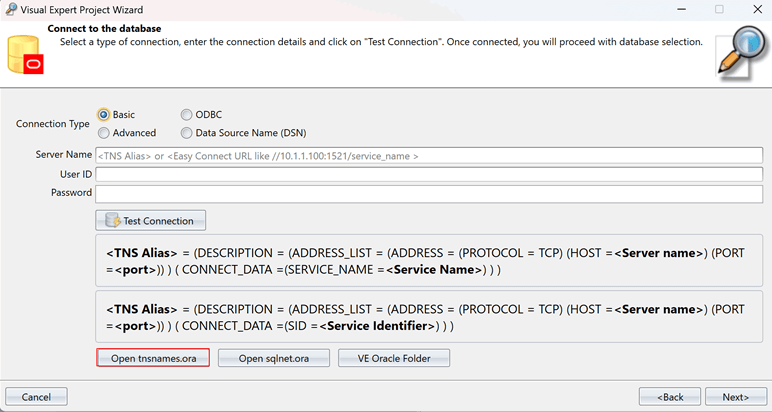
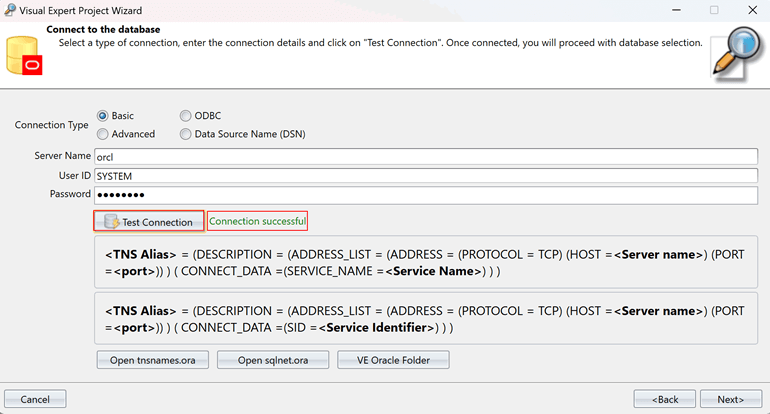
- Click on [Basic] radio button. Enter the required details.

- Click on [Open tnsnames.ora] to fetch the Server Name.
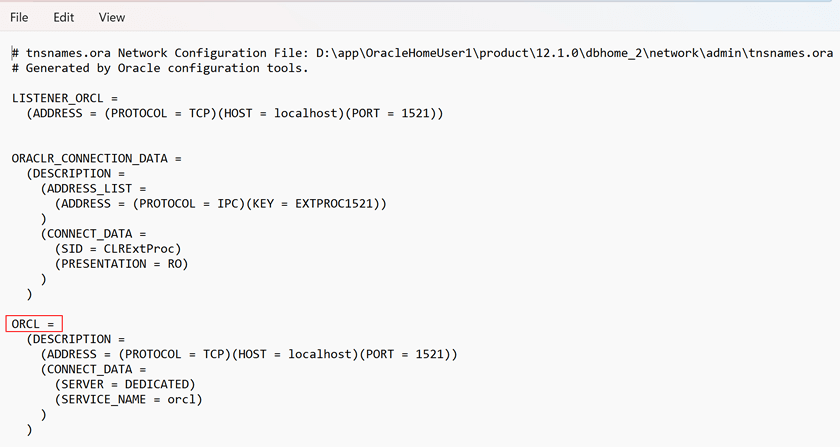
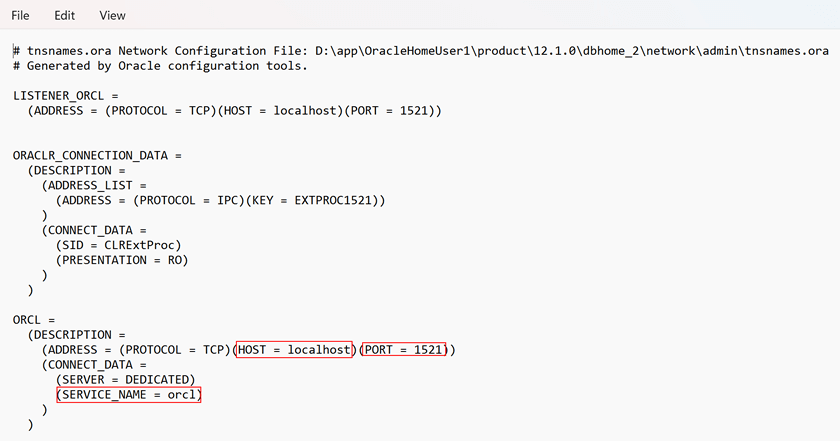
- The tnsnames.ora file will open in Notepad, and you'll see the "Server Name" listed there.
- Enter the username and password.
Click [Test Connection] and wait a few seconds for a "Connection Successful" message.
Then, click [Next] and follow the wizard.
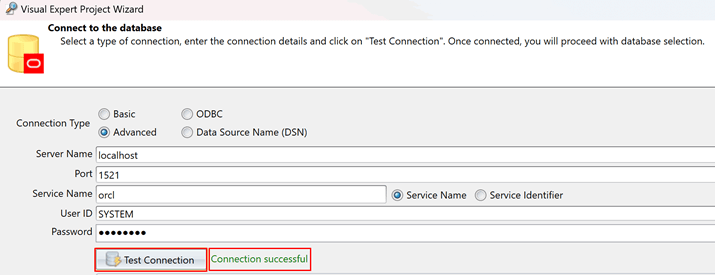
Case 2: Connection Type – Advanced
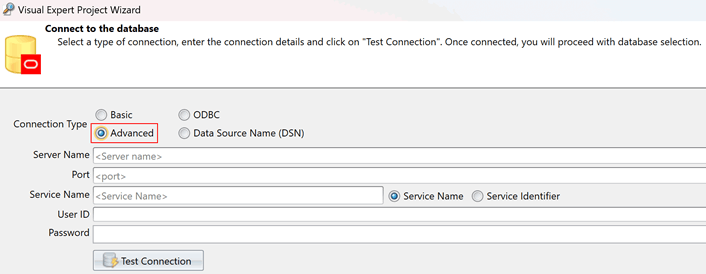
- Follow the above mentioned steps to arrive at the page below and select the [Advanced] radio button.
- Click on [Open tnsnames.ora] to fetch the "Server Name", "Port", and "Service Name".
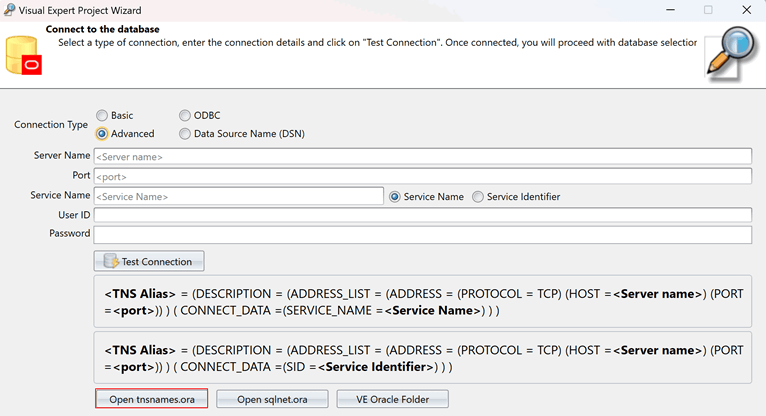
- The tnsnames.ora file will open in Notepad, and you'll see the required details.
Note: Enter the HOST details as Server Name.
- Enter the username and password.
Click [Test Connection] and wait a few seconds for a "Connection Successful" message.
Then, click [Next] and follow the wizard.
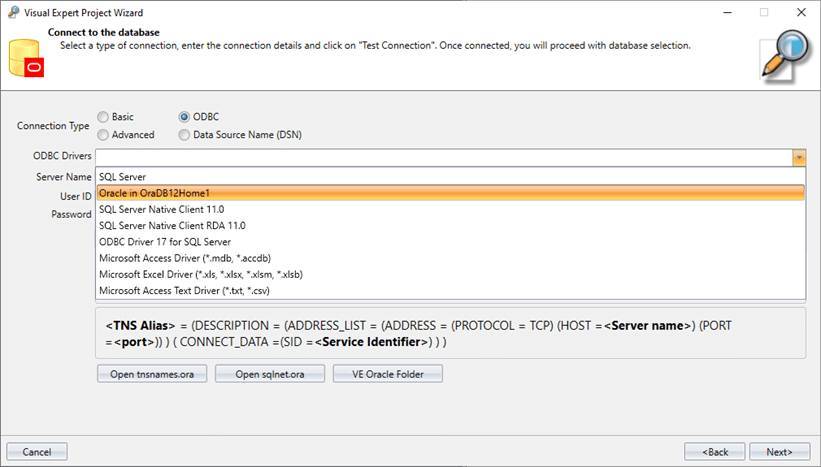
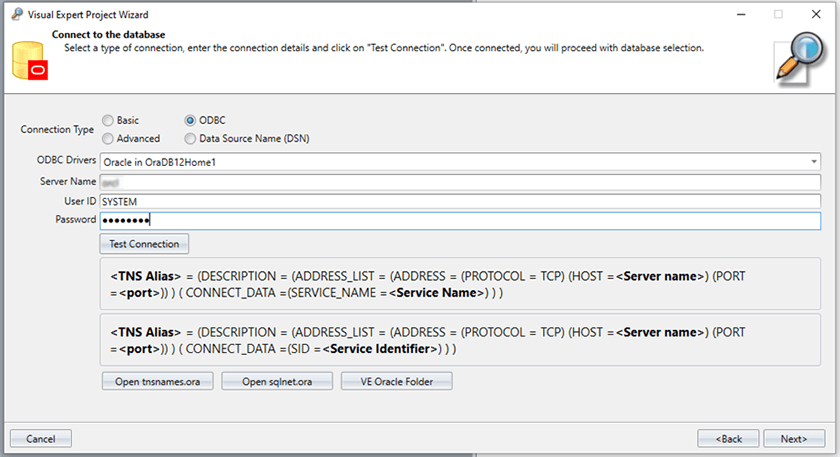
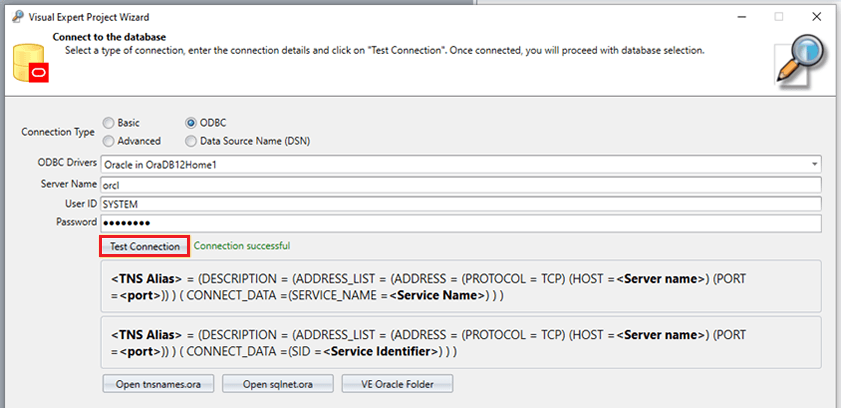
Case 3: Connection Type – ODBC (Open Database Connectivity)
- Follow the above mentioned steps to arrive at the page below and select the [ODBC] radio button.
From the ODBC drivers dropdown, select the appropriate ODBC drivers for Oracle.
- Enter Server Name, User ID and Password.
- Click on [Test Connection]. Then, click [Next] and follow the wizard to analyze the added source code.
Case 4: Connect using Data Source Name (DSN)
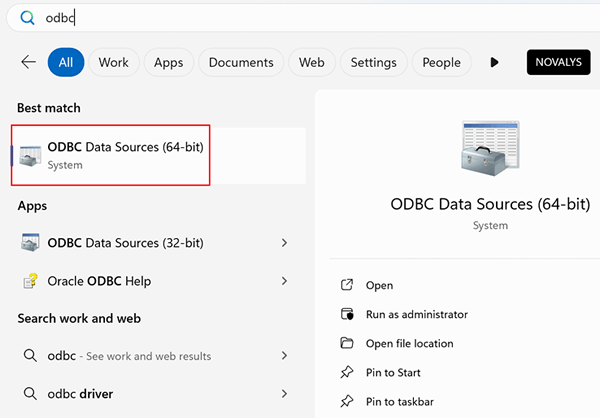
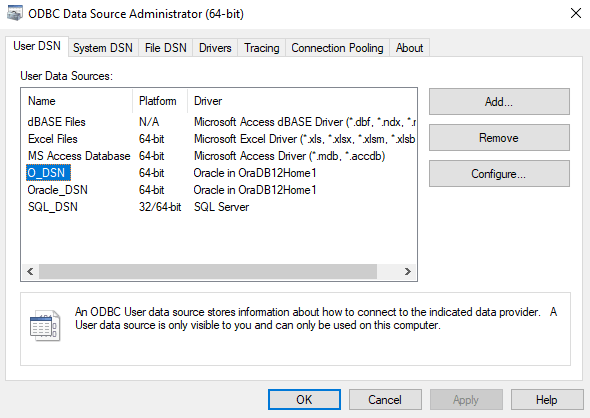
- You need to create a Data Source Name. Open the "ODBC Data Sources" on your PC.
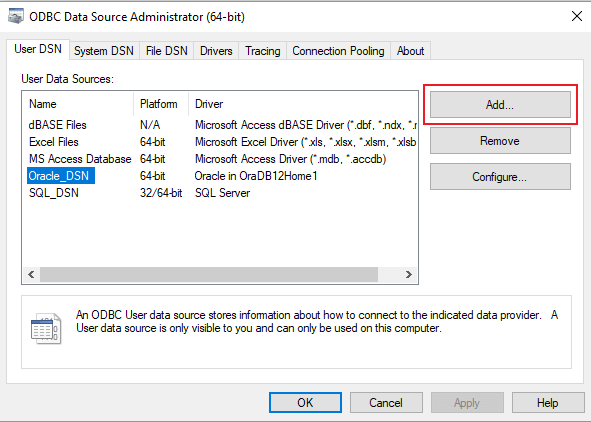
- The ODBC Data Source Administrator will open on your screen. Click on [Add].
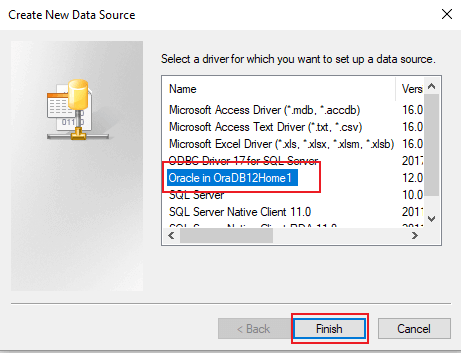
- Select the appropriate ODBC drivers for Oracle and click on [Finish].
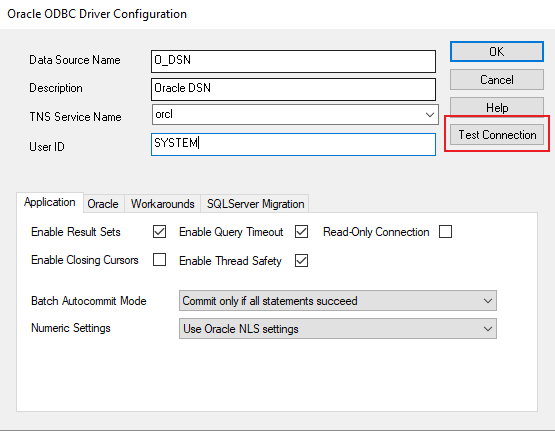
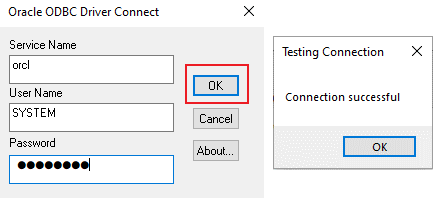
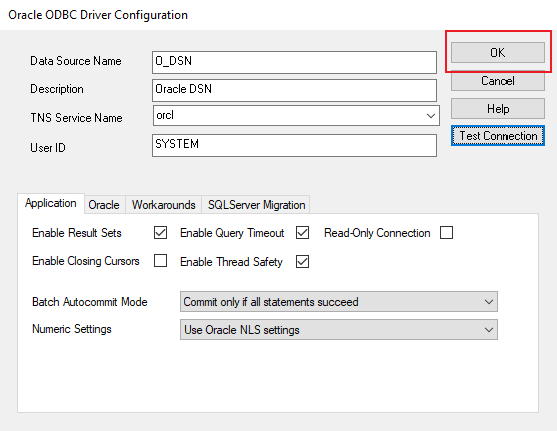
- Enter the Data Source Name, description, TNS Service Name, and User ID. Click on [Test Connection].
- Enter the password to check the connection. Once, tested successfully, click on [OK].
- You will see that the new Oracle DSN is added to the Data Source Administrator.
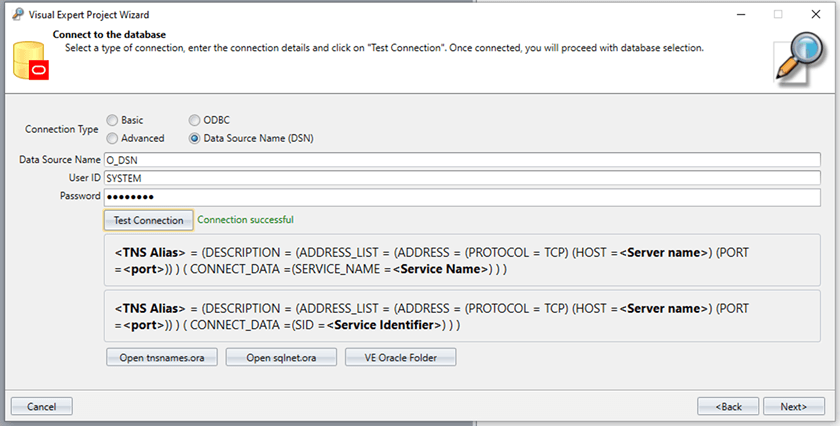
- Open Visual Expert. Select the [Data Source Name] radio button as the connection type.
Enter the Data Source Name, User ID and Password. Click on [Test Connection].
Once connected successfully, proceed with the project creation.
More from VE Configuration
- Connect to SQL Server DB using ODBC and DSN
- Configuring Oracle Cloud Database Connection
- Windows Authentication for Connecting to a VE Repository