HOW TO GENERATE DIAGRAMS
This tutorial covers the following topics:
GENERATE A DIAGRAM
Data Model
Requirements:
- If your Visual Expert project is reading code from a database, you should include the tables in your analysis.
- If your Visual Expert project is reading code from files & folders, you must include create table statements and foreign key definitions.
Procedure:
- In the treeview, double-click on the table icon to list the tables in your project
- Select a table - if needed enter its name in the quick search field to find it.
- Go to [Diagrams] in the ribbon menu, and click on "Data Model"
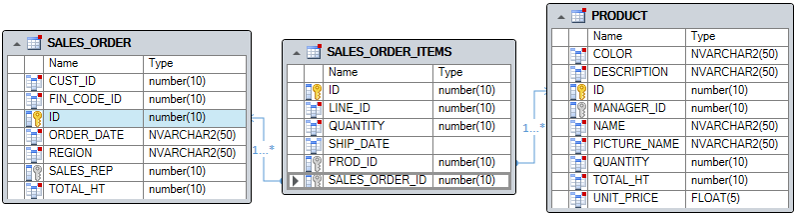
- You can collapse each table for a more compact diagram
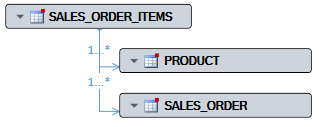
- Select a table, a column, an object, a function or a variable in your project.
- Go to [Diagrams] in the ribbon menu, and click on "Impact Analysis"

PBL dependencies
- In the treeview, double-click on the PBL icon to list the PBLs in your project
- Select a PBL - if needed enter its name in the quick search field to find it.
- Go to [Diagrams] in the ribbon menu, and click on "PBL Dependencies"
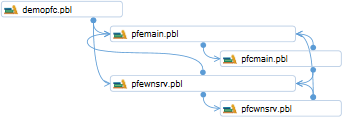
- If your Diagrams includes lots of PBLs and relationships, you can select a particular PBL > the connected PBLs will be highlighted in blue:

Edit a diagram
Once generated by Visual Expert, you can edit your diagram:
- Click on the "edit" button
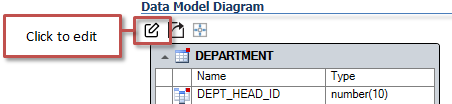
- The diagram opens in a dedicated editor

- Adjust the diagram as needed.
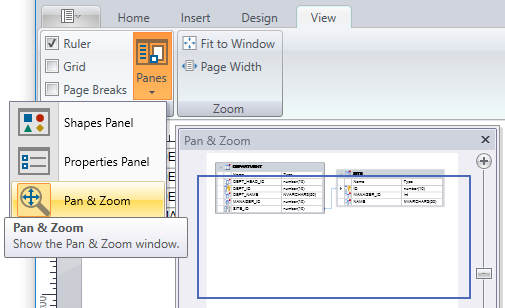
- If your diagrams includes lots of items, adjust the display with [View - Panes - Pan & Zoom]:
- Once you're done, close the editor > the diagram is updated in Visual Expert
Share or export a Diagram
Depending on your needs, you have several options to share or export diagrams:
1. Share the diagram with other Visual Expert users
This option allows anyone connected to your VE project to download a copy of the diagram in his Visual Expert client, to leverage the features of the VE UI: diagram synchronized with source code, code exploration, etc.
- Select the parent item of the diagram ("Department" in this example)
- Right-click - Select "Create view from selection"
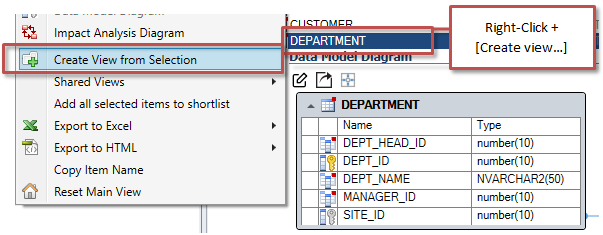
- This will isolate the diagram in a separate view (tabpage)
- Right-click on the tab name - Select "Share this View":
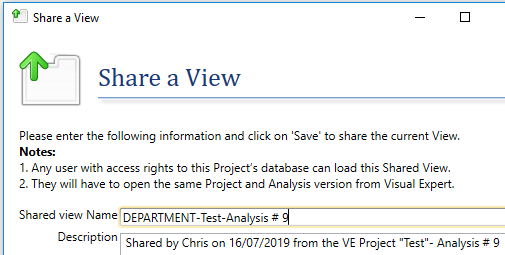
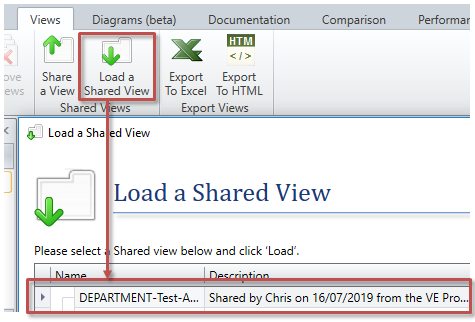
- All VE users connected to your project can open this view from [View - Load a shared View]
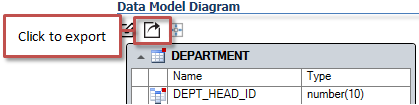
2. Export the diagram as an image
After generating the diagram, simply click on the "export" button to generate a PNG file:
3. Export the diagram as an editable file
From the Diagram Editor:
- Go to [File - Save As…]
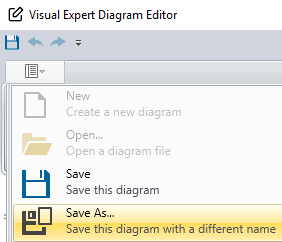
- Choose a name and location
- The diagram is saved as a "*.velogdiagram" file
- Other Visual Expert users can simply double-click on the diagram to edit it.