Explore, Analyze & Document your Code
Create a Visual Expert Project with SQL Server T-SQL Code
This tutorial includes 3 steps:
Step 1 – Add SQL Server Code
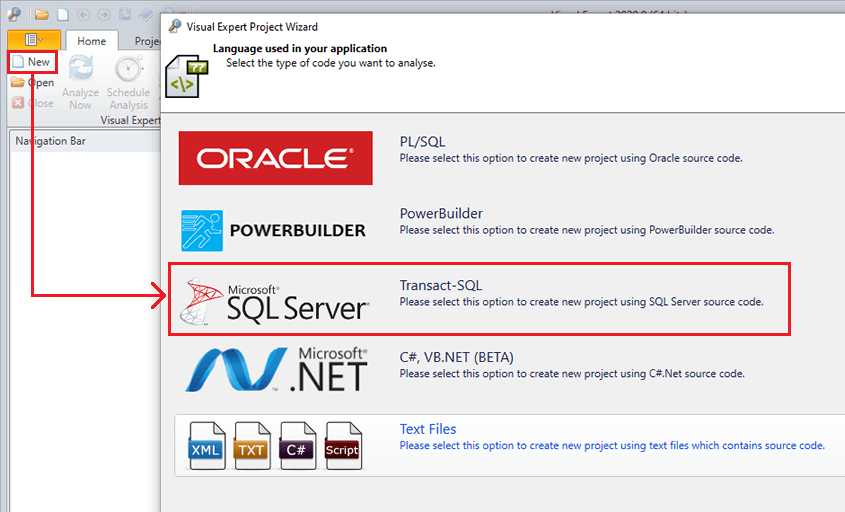
- Click ‘New’ on the ribbon menu and select ‘SQL Server Transact-SQL’ in the Project Wizard.
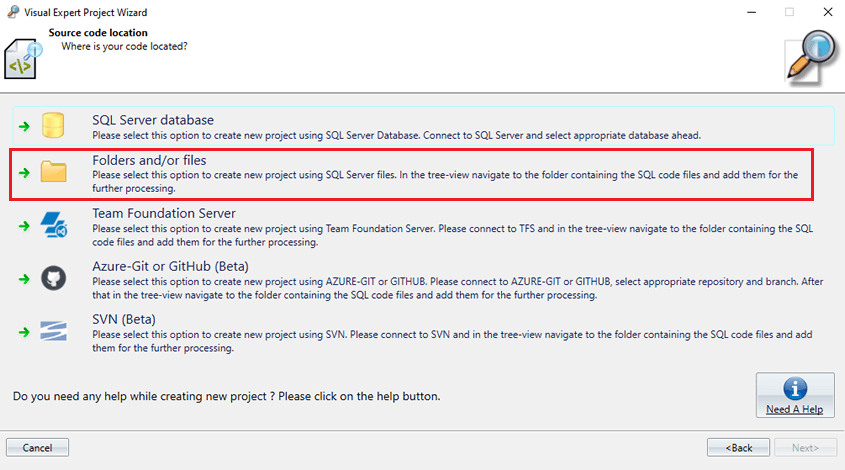
- Click on “Folders and/or files” in the next window.
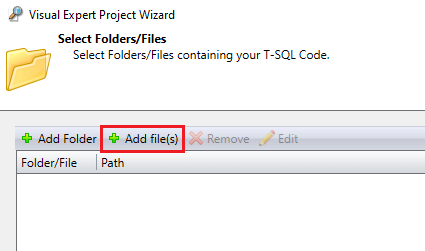
- Specify the location of your SQL Server code by clicking on “Add files”.
Then click on ‘Finish’.
Step 2 – Select the objects you wish to analyze
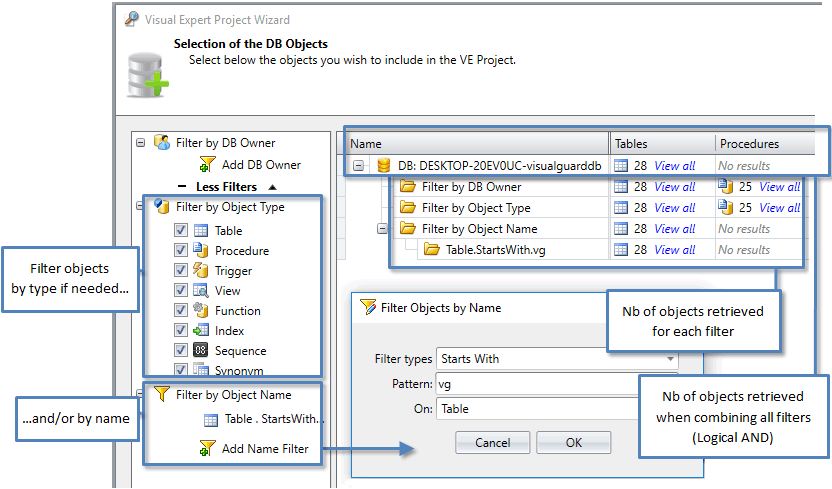
- Important: If you're connecting to a database, Visual Expert will analyze all the objects accessible from this connection, including all schemas, tables, procedures, system objects, etc. In this case, it is highly recommended to filter the DB objects you wish to analyze:
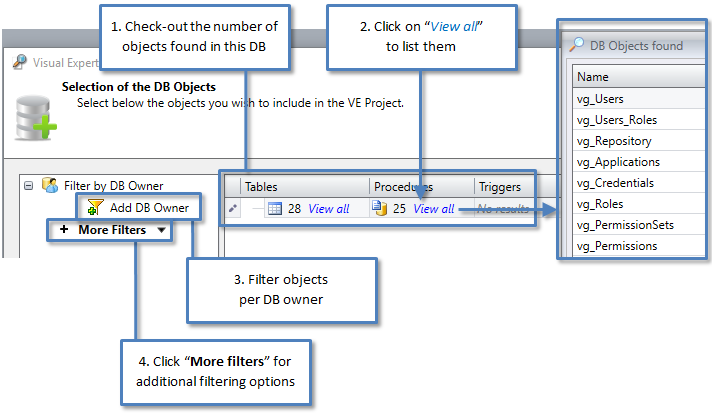
- If you click on "More Filters" you get the following options:
- Once your SQL Server object selection is completed, click "Next" > select "Open project setup".
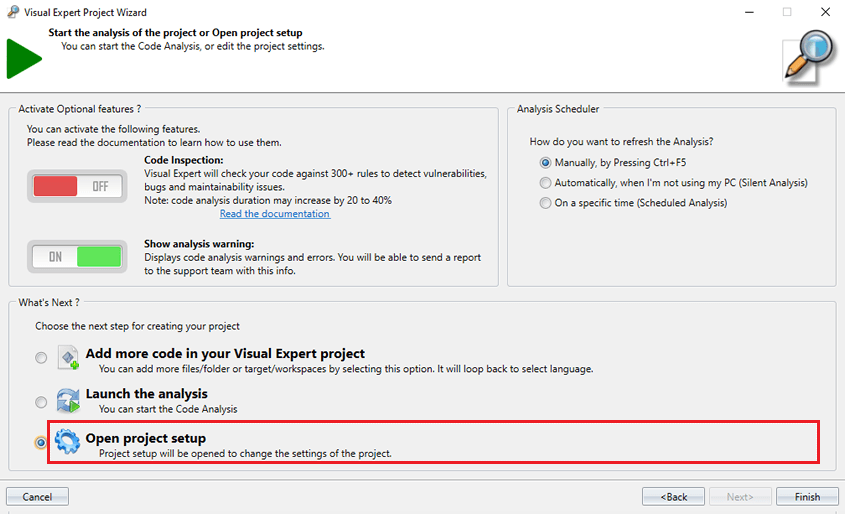
- Name your Visual Expert project
- Set the scheduler to refresh your code analysis automatically on a regular basis
- Select "Launch the analysis"
- After analysis, you will see SQL Server and Transact-SQL objects in the treeview
Step 3 – Remove Ambiguities and Duplicate Tables
Why this step?
Select  firstname,  lastname  from  employee
Select  firstname,  lastname  from  myschema.employee
This basic example may create an ambiguity:
By default, the Visual Expert code parsers cannot know whether employee and myschema.employee refer to the same table. Unless we remove this ambiguity, Visual Expert will duplicate the table employee.
Please read this article to remove possible ambiguities in your project.