Explore, Analyze & Document your Code
Creating a New Project Using an SVN Folder
Follow the steps below to create a new project in Visual Expert using source code stored in an SVN folder.
Step 1: Start Visual Expert and the Project Wizard
- Launch Visual Expert.
- Open the Create Project Wizard.
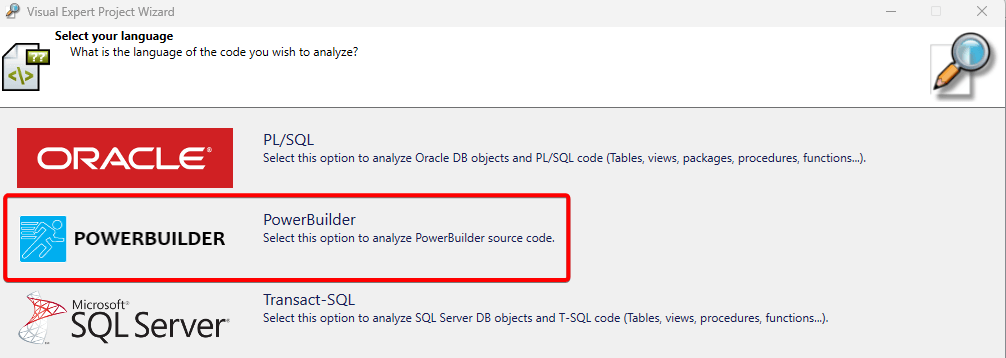
- When prompted to select the project language, click on PowerBuilder.
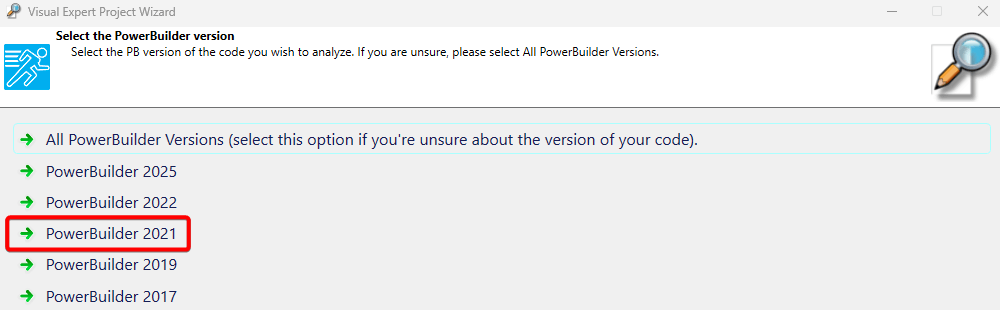
Step 2: Select the PowerBuilder Version
Choose the version of PowerBuilder you are working with.
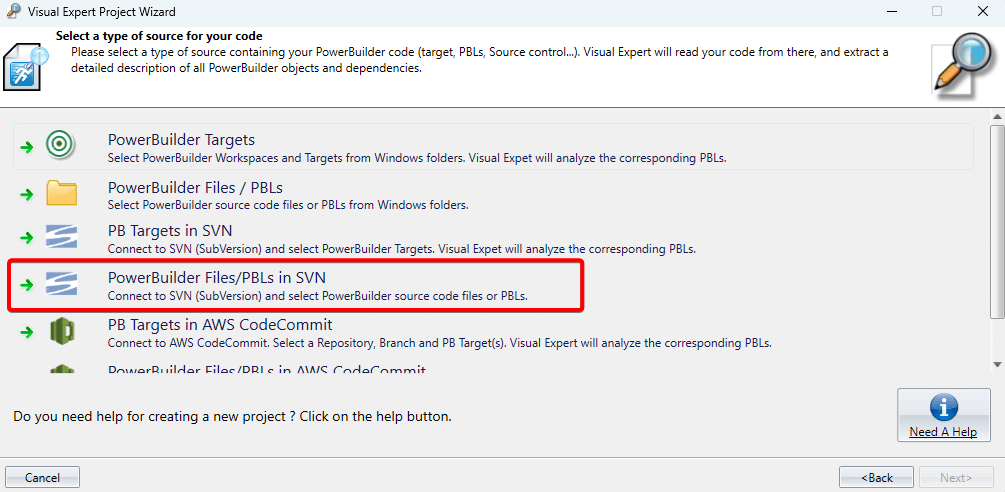
Step 3: Choose the Source Code Type
- Select PowerBuilder Files/PBLs in SVN as the source code type. Click [Next].
Step 4: Connect to the SVN Server
- Enter the
SVN Server URLalong with your credentials. Click Connect to SVN.
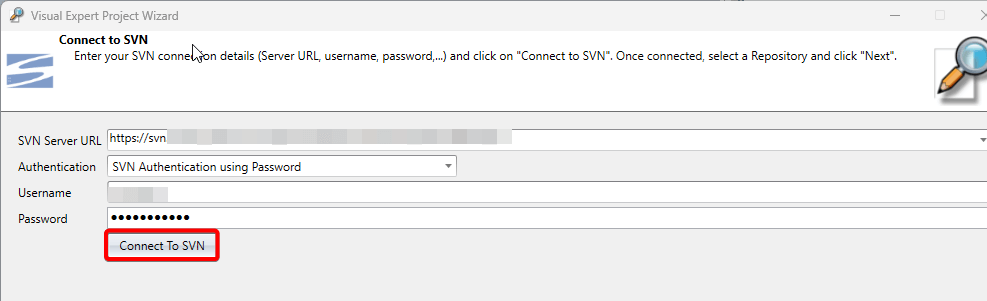
Step 5: Verify Connection
If the connection is successful, a confirmation message will appear. Click [Next] to continue.
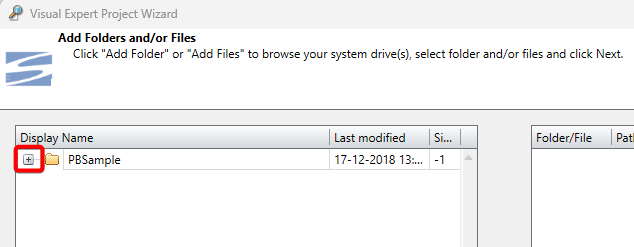
Step 6: Expand the SVN Folder
Click the [+] sign to expand the folder and display all files.
Step 7: Locate the ws_objects Folder
- Scroll through the expanded list to confirm that the
ws_objectsfolder is present. - Once verified, scroll back up to the top of the folder list.
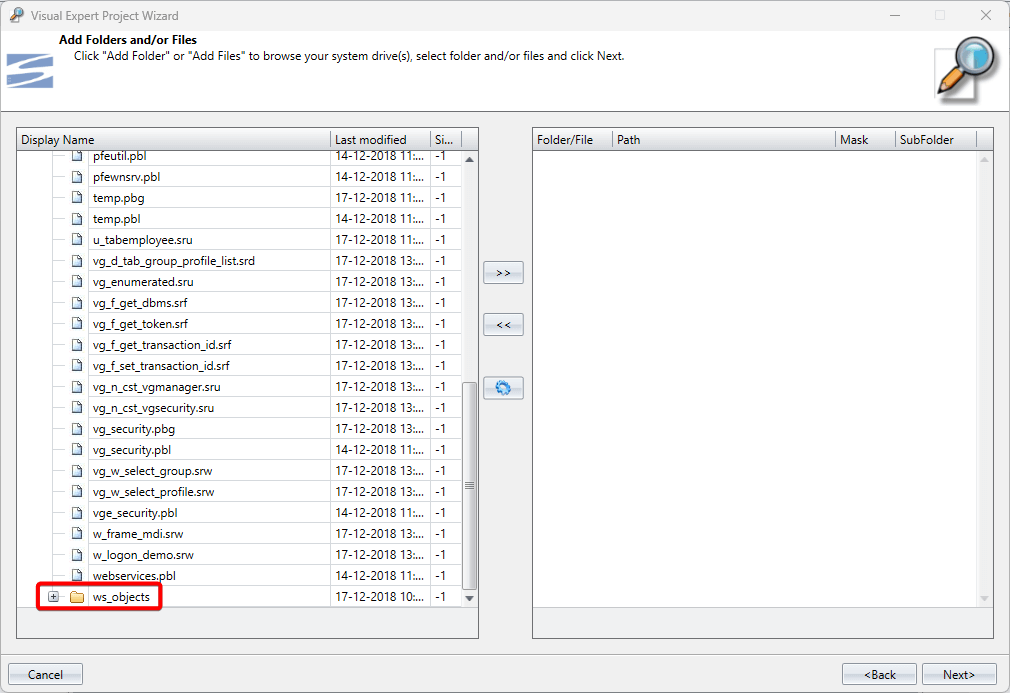
Step 8: Select the Parent Folder
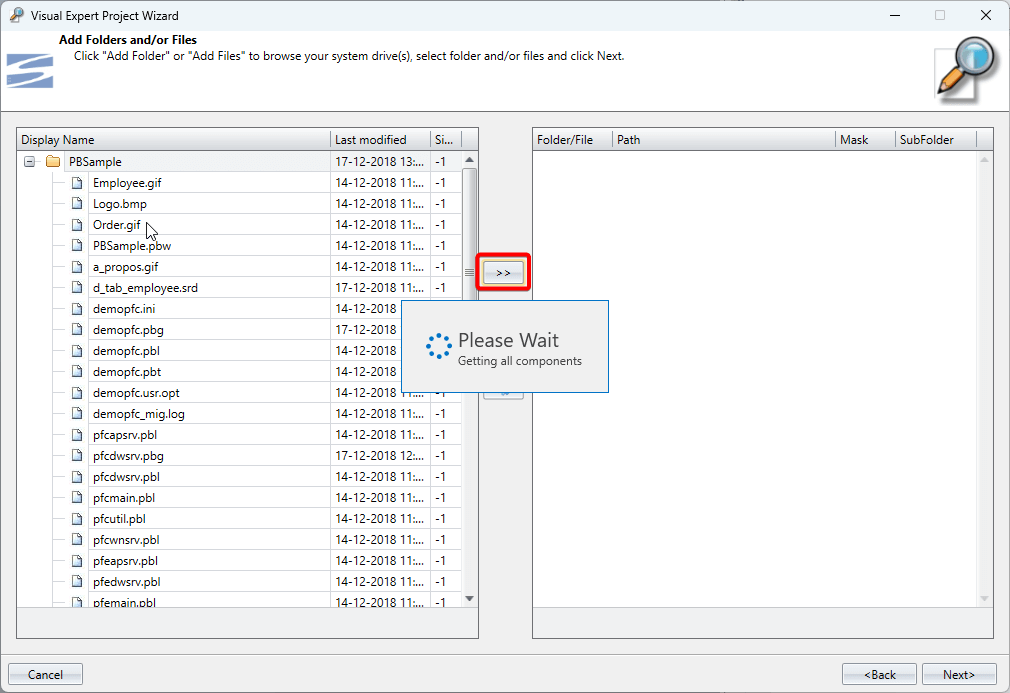
- Select the parent folder of
ws_objects(for example,PBSample). - Select the
PBSamplefolder and click the right-side arrow (>>) to browse further.
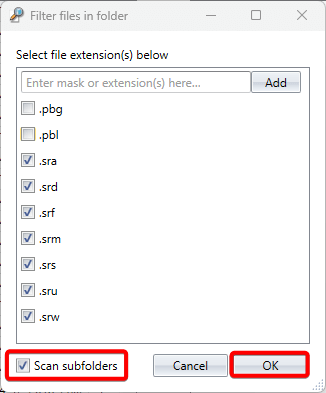
Step 9: Scan Subfolders and Apply Filters
- Click Scan Subfolders.
- Select the file extensions you want to include.
- Exclude unnecessary extensions such as
.pbl,.pbg, etc. - Click [OK].
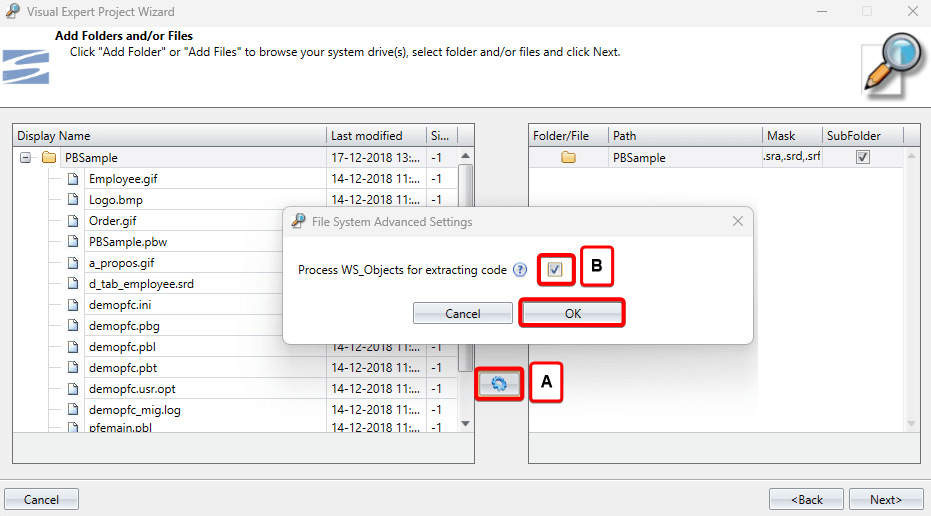
Step 10: Configure Target Settings
- In the target section (right-hand panel), select the
PBSamplefolder. - Click on the Settings icon (A).
- Enable the required check box (B).
- Click [OK], then click [Next].
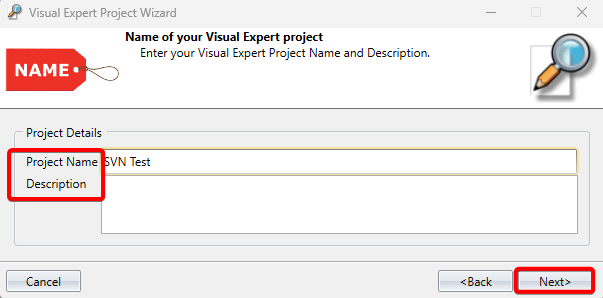
Step 11: Enter Project Information
Provide a Project Name and a Description. Click [Next].
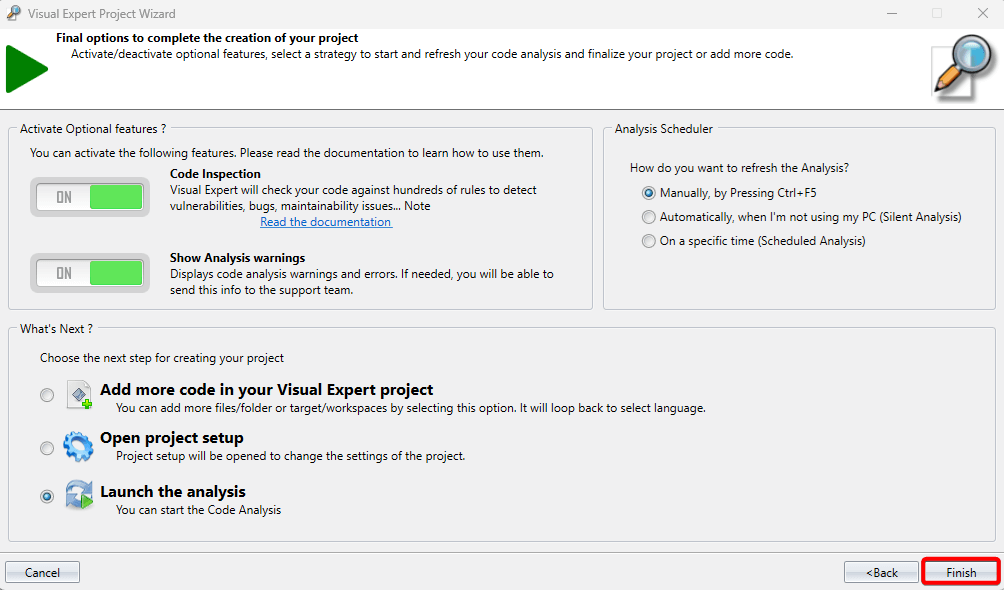
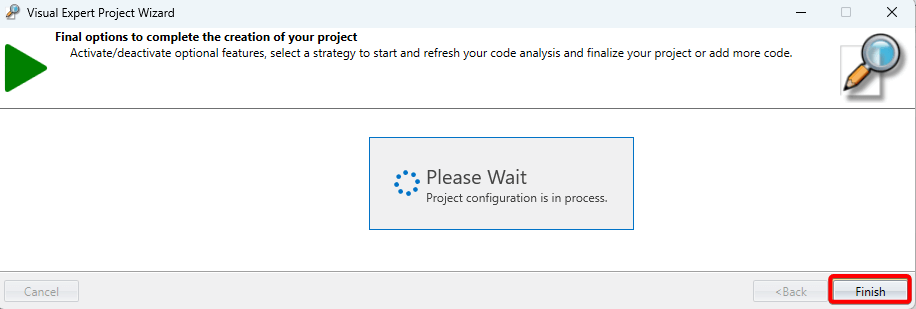
Step 12: Complete the Wizard
Click [Finish] to exit the project creation wizard.
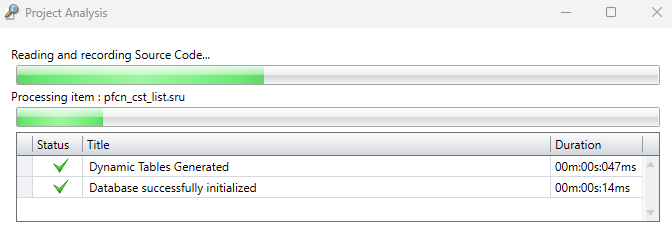
Step 13: Start Project Creation
The project creation process will begin, and the source code analysis will start automatically.
The analysis process may take several minutes to complete.
Step 14: Review Analysis Results
- Once the analysis is complete, results will appear in the tree-view.
- Select the PBLs and execute the All PBLs macro.
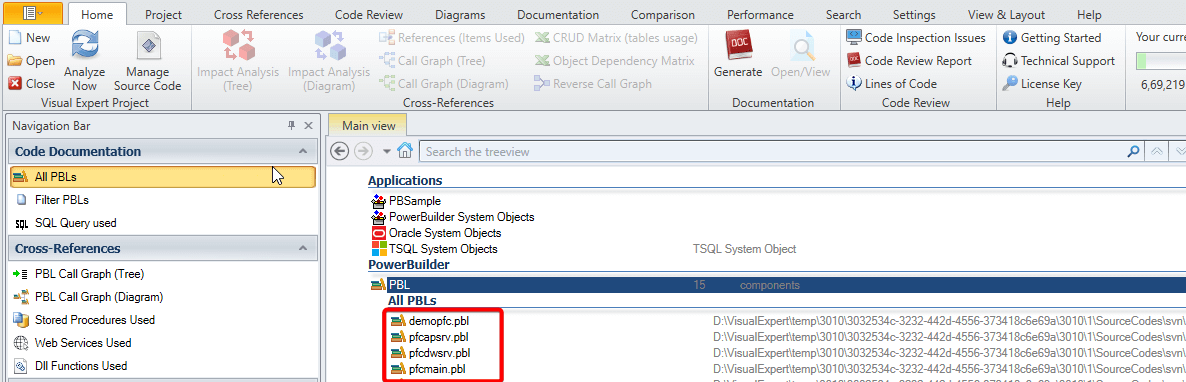
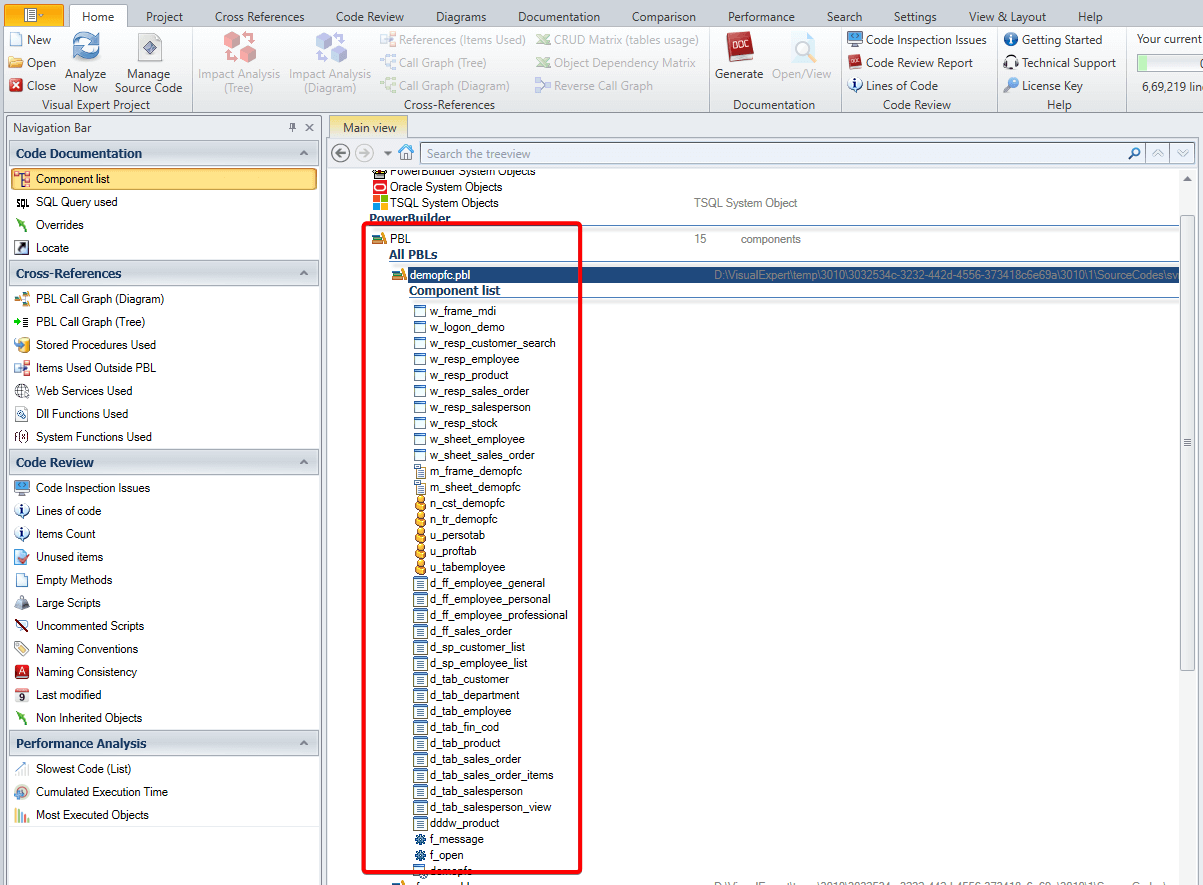
Step 15: Explore Components
- Each
*.pbl.srcfolder is treated as a PBL. - The corresponding PBLs are displayed in the tree-view.
- Select one PBL, click Component List, and you will see all components within that folder.