This article helps Visual Expert users understand how to manage their hard disk space effectively. It explains how to automatically delete old VE code analysis, when the data storage reaches a certain limit.
- Open Visual Expert. Go to Settings > More Settings in the ribbon menu.

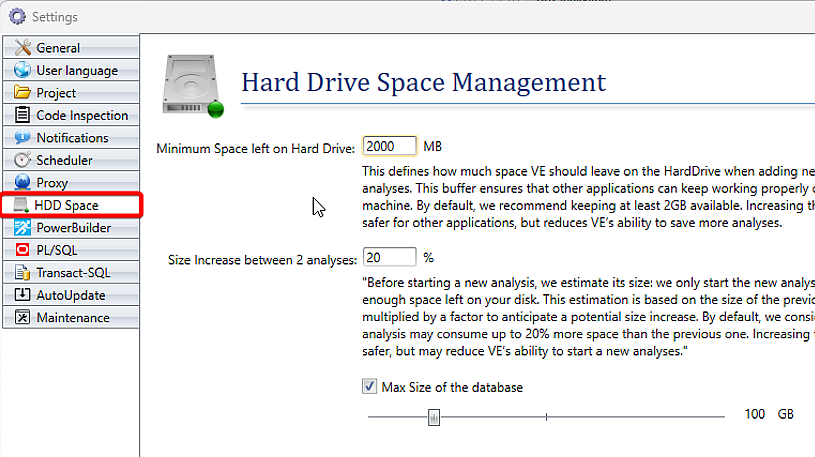
- Select the HDD Space in the Settings dialog box.

You can modify three key settings to manage your hard drive space:
- Minimum Space Left on Hard Drive
This setting defines the amount of space Visual Expert should leave free on your hard drive when adding new code analyses. This buffer ensures that other applications on the same machine can function properly. By default, we recommend maintaining at least 2GB of free space. Increasing this value provides more safety for other applications but reduces the amount of space available for Visual Expert analyses. - Size Increase Between Analyses
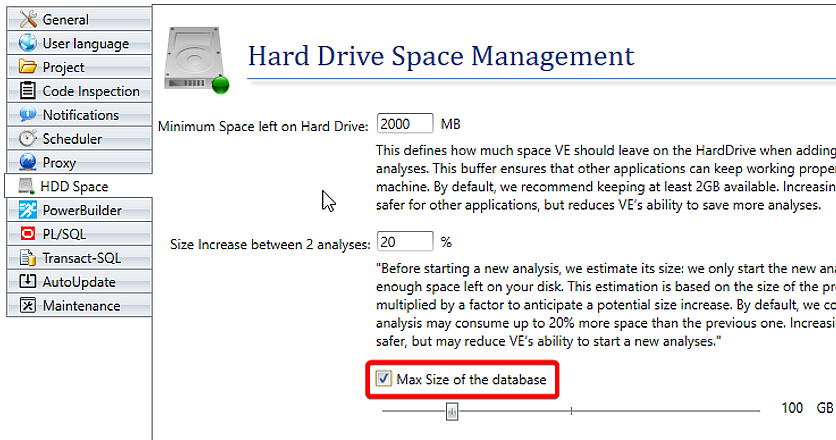
Before starting a new analysis, Visual Expert estimates its size and ensures there is enough space on your disk. This estimation is based on the size of the previous analysis, multiplied by a factor to account for potential increases. By default, we assume a new analysis may use up to 20% more space than the previous one. Increasing this value provides more safety but may limit Visual Expert's ability to start new analyses. - Maximum Size of the Database
Check the checkbox for "Max Size of the Database" to set the maximum allowed size for the Visual Expert project database. If the project database size exceeds this limit (e.g., 100GB), Visual Expert will automatically delete the oldest analysis to make room for a new one.

By configuring these settings, you can ensure Visual Expert runs smoothly without compromising the performance of other applications on your machine.
More from System Optimization
- Optimize your disk space
- Integration with PowerBuilder IDE
- Configure Visual Expert Scheduler with Windows Authentication
