PreCommand Analysis to automate code workflows
PreCommand Analysis is the process of executing predefined commands or scripts before running a project analysis. This proactive step helps prevent errors, maintain consistency, and streamline development workflows.
When integrated with source control systems such as GitHub, GitLab, or Bitbucket, PreCommand Analysis can automatically pull the latest code, enforce policies, and perform checks before the actual analysis begins. The result is a smoother pipeline, fewer manual errors, and improved deployment reliability.
In this article, we’ll walk through how to implement and use PreCommand Analysis - specifically within a PowerBuilder project to ensure your code analysis always runs on the most up-to-date and consistent codebase.
Why Use PreCommand Analysis?
- Automates Pre-Checks: Automatically runs essential setup tasks before analysis.
- Ensures Code Freshness: Pulls the latest code from your repository before analysis begins.
- Reduces Human Error: Minimizes missed updates or incorrect configurations.
- Improves Workflow Consistency: Keeps all environments and analyses in sync with version control.
Step-by-Step Implementation Guide
Step 1: Create a New Project
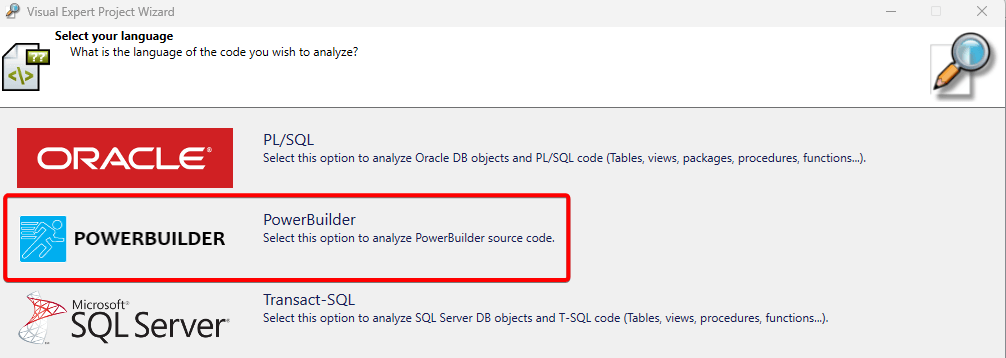
- Launch Visual Expert and open the Create Project wizard.
- Select [PowerBuilder] as the project language.
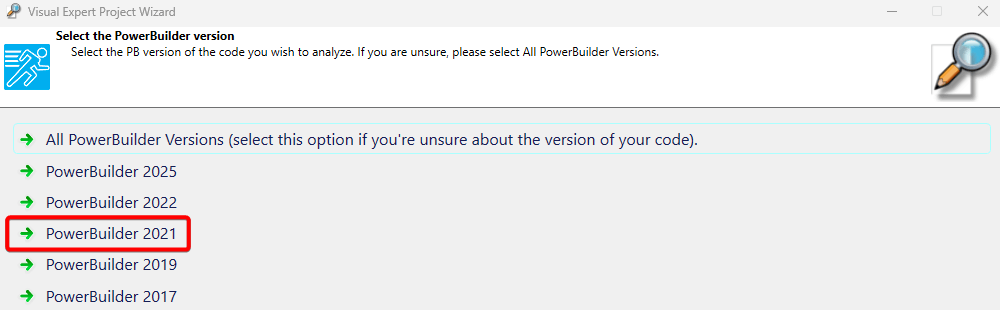
- Choose the PowerBuilder version appropriate for your environment.
Step 2: Configure the Source
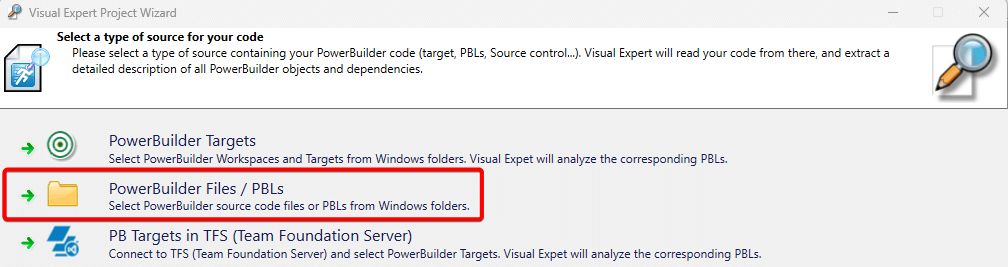
- Select the type of source for your code. For this example, choose PowerBuilder Files / PBLs.
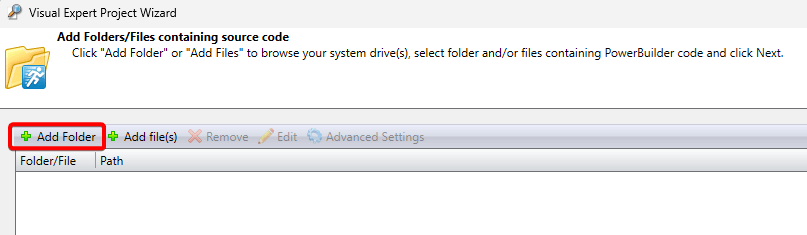
- Click [Add Folder] - then click Next.
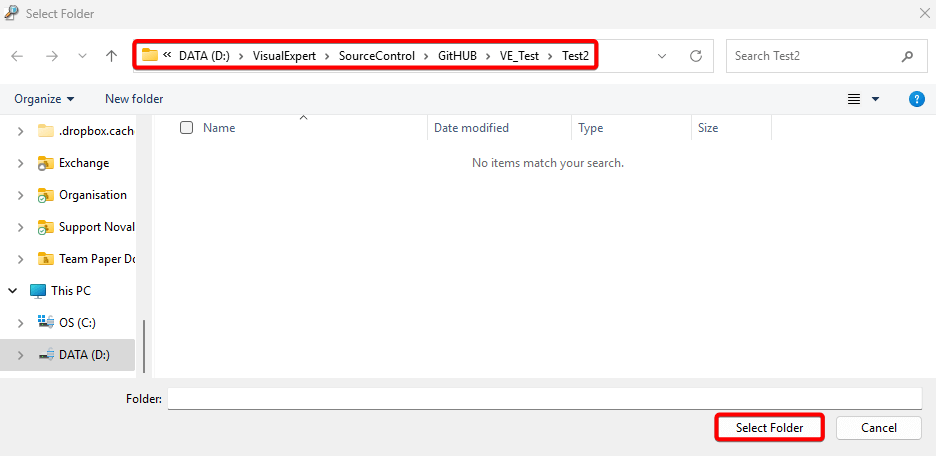
- Browse to your source folder and click [Select Folder].
Step 3: Define the Project Structure
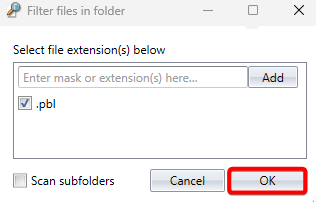
- Select the file extension .pbl, then click [OK].
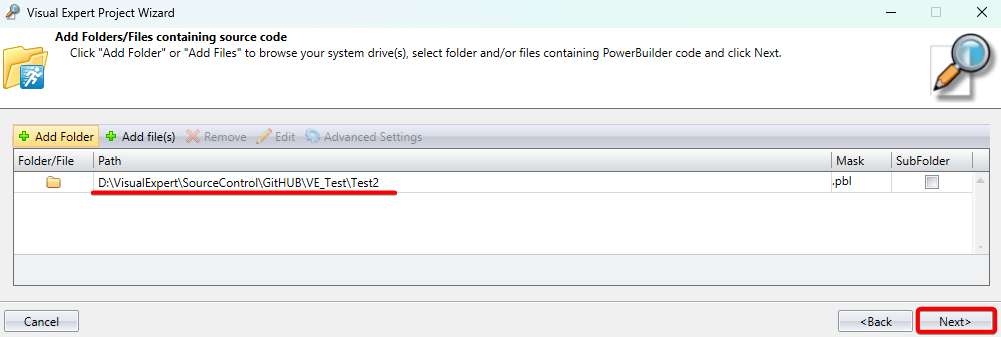
- Confirm the project path and click Next.
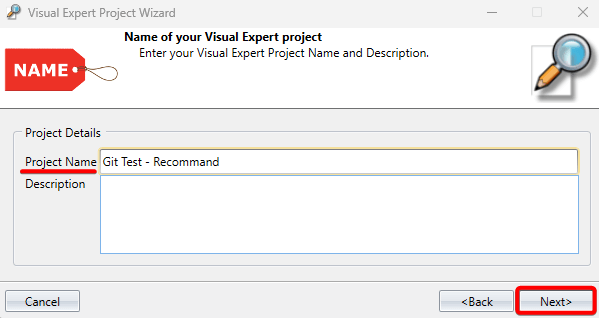
- Enter your Project Name and Description, then click Next.
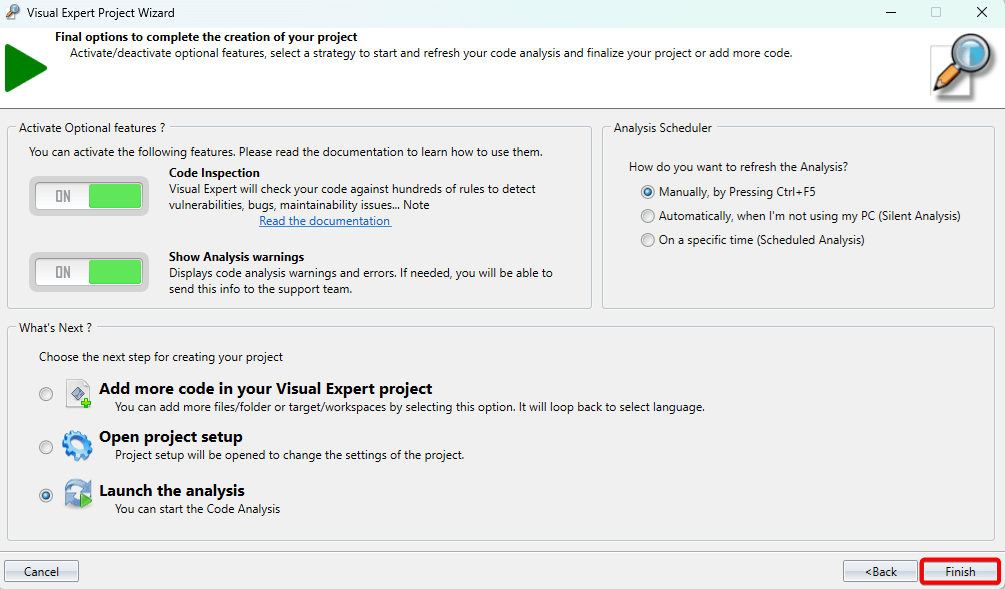
- Review the configuration summary and click [Finish] to create the project.
Step 4: Run the Initial Analysis
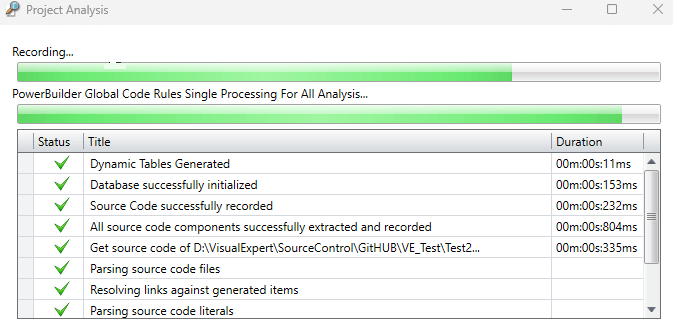
- Once the project is created, the system will automatically begin analyzing your PowerBuilder libraries (PBLs).
You will see the progress of the analysis as it runs.
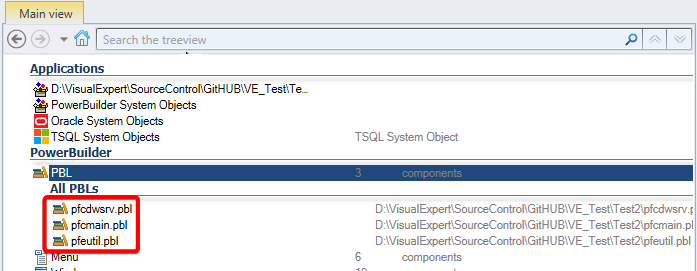
- Post the analysis completion, you will see the PBLs listed in the Main View.
Step 5: Configure the Pre-Analysis Command
- Navigate to Manage Source Code → Project → Pre-Analysis Command.
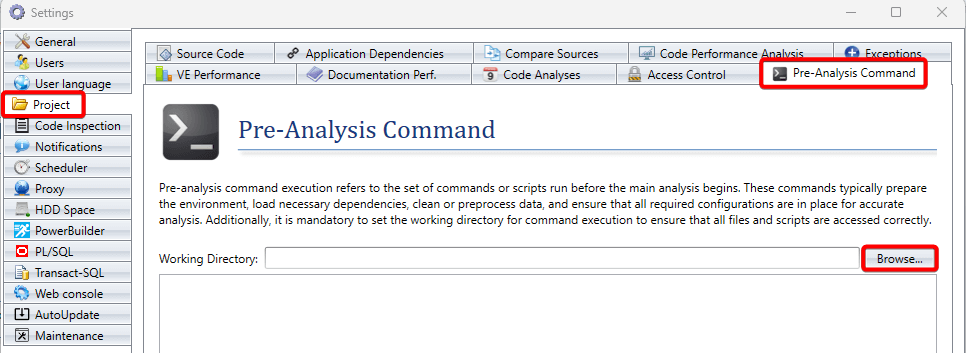
- Browse through your local folder and click [Select Folder].
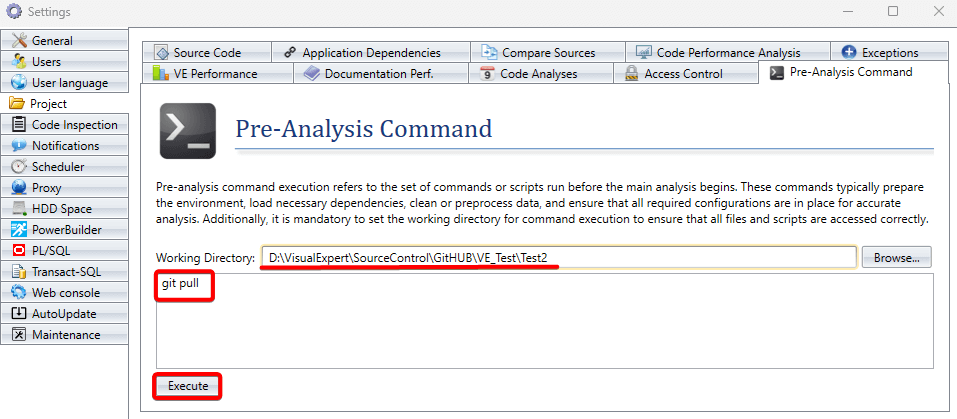
- In the command field, enter the command you wish to execute before analysis. For example:
git pull - Click [Execute]. This command will run automatically before the project analysis starts.
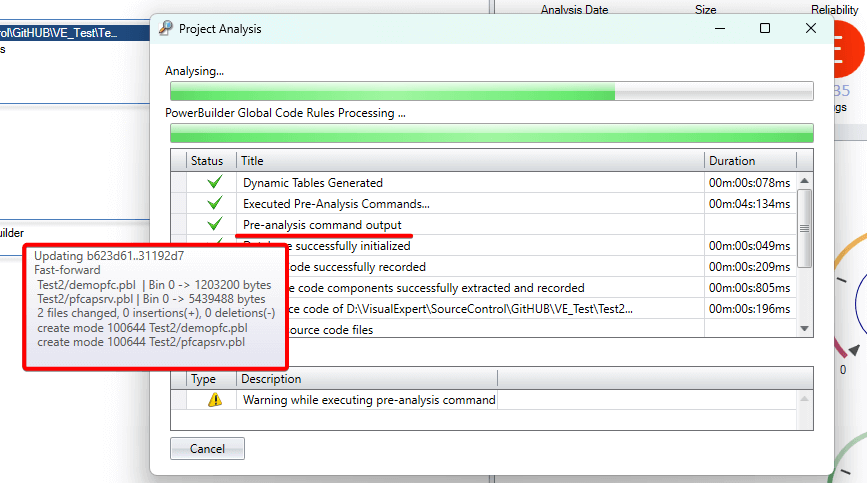
Step 6: Run the Final Analysis
When you run the project analysis again:
- The system will first execute the Pre-Analysis Command (in this case,
git pull), ensuring that the latest code is fetched from the Git repository. - Then it will proceed with the code analysis using the updated files.
After execution, the Pre-Analysis Command output comment confirms the successful completion of the task. You can hover over this comment to view details about the source code retrieved from the repository.