Steps to Move SQL Server Database Files to a Different Location
When working with SQL Server, you may need to move database files to another location—whether for storage optimization, performance improvements, or organizational changes. This guide outlines two safe methods to relocate SQL database files while ensuring minimal downtime and data integrity.
Prerequisites
- SQL Server Management Studio (SSMS): Download and install from the link below if not already available: Download SSMS
- Full Backup Required: Always take and verify a full database backup before proceeding.
Step 1: Take Full Database Backup
Before proceeding, execute the following SQL command to create a backup of the database:
BACKUP DATABASE [<Project Database>]
TO DISK = 'C:\Backup\<Project Database>.bak'
WITH INIT, COMPRESSION, NAME = '<Project Database> Full Backup';
Replace <Project Database> with your actual database name. Ensure that:
- The backup completes successfully.
- The backup file is verified and stored safely.
Step 2: Proceed with Moving Database Files
Once the backup has been successfully created and verified, proceed with the implementation steps outlined below.
There are two primary ways to move SQL Server database files:
- Using SQL Server Management Studio (UI method)
- Using SQL scripts in SSMS (T-SQL method)
Option 1: Move Files Using SQL Server Management Studio (UI)
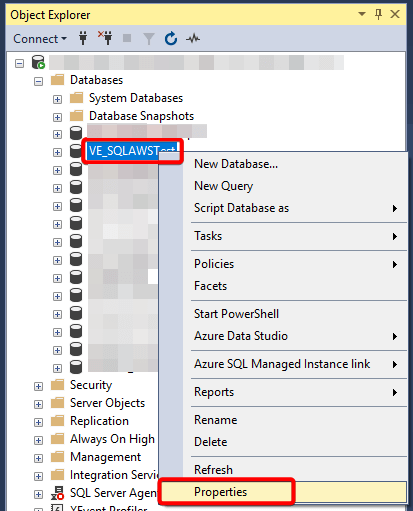
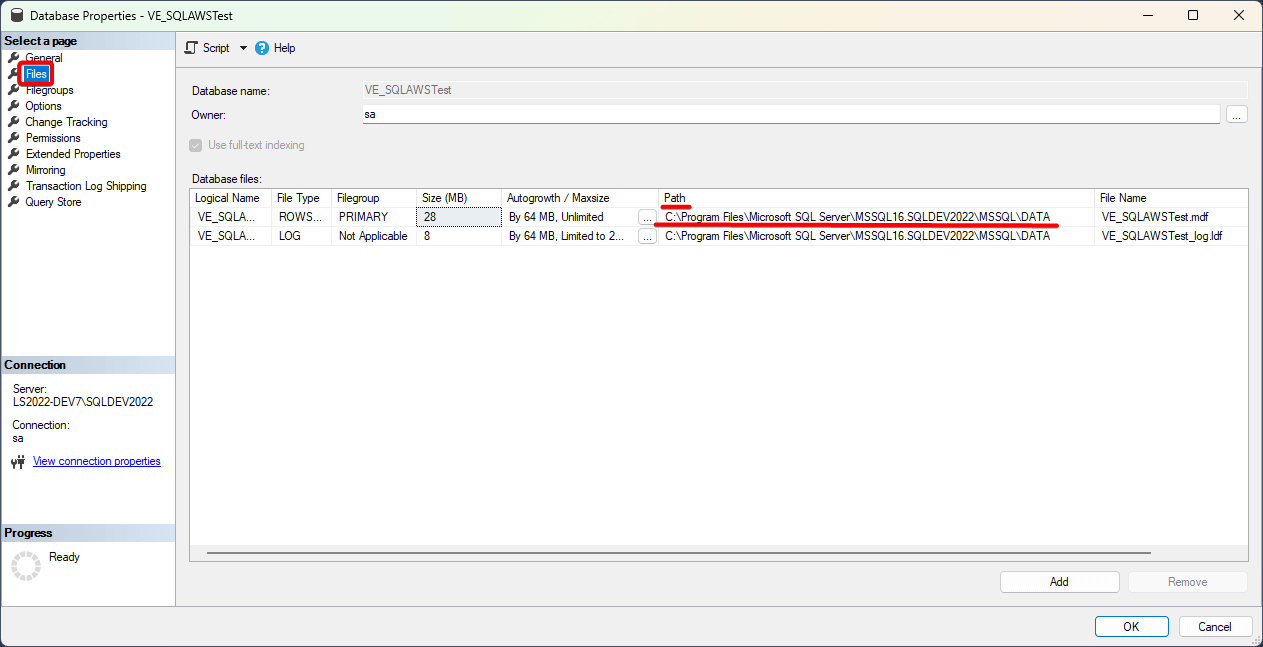
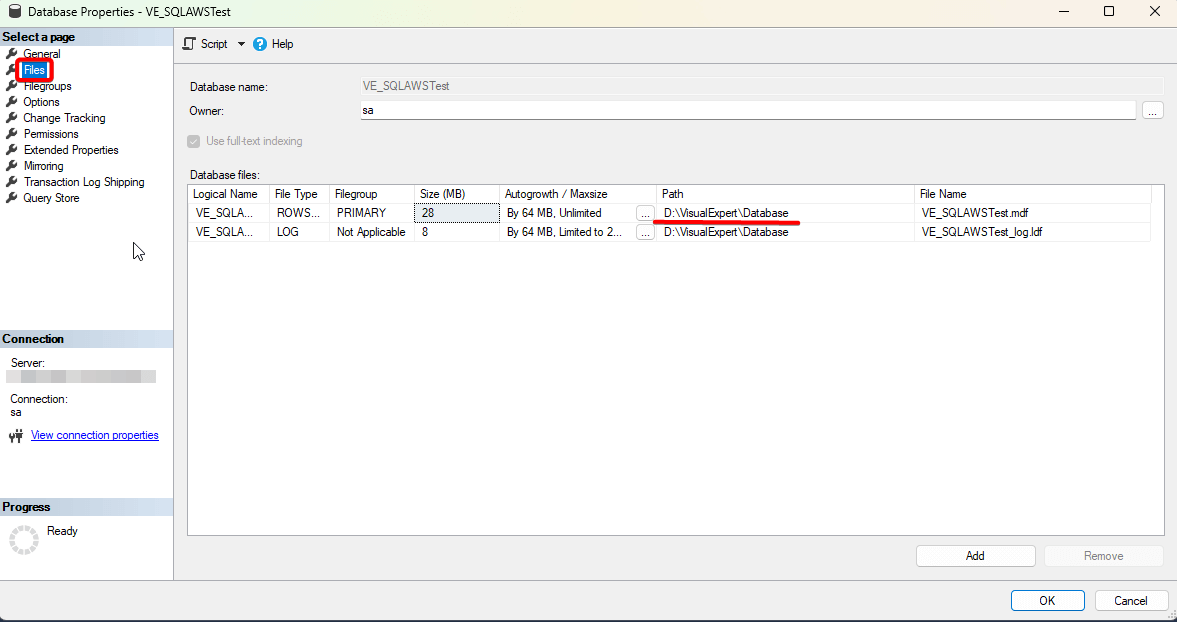
- Open SSMS (SQL Server Management Studio) and right-click the database you want to move → Properties.
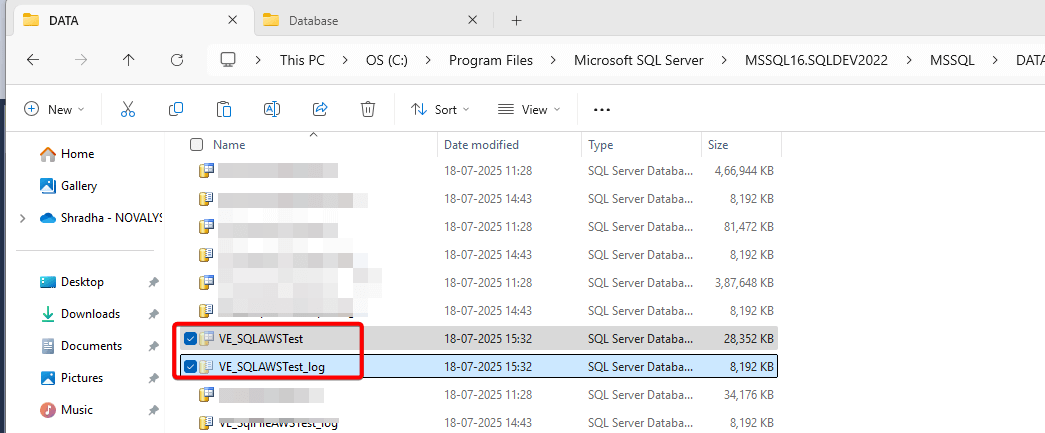
- Locate and note the current file paths (MDF and LDF).
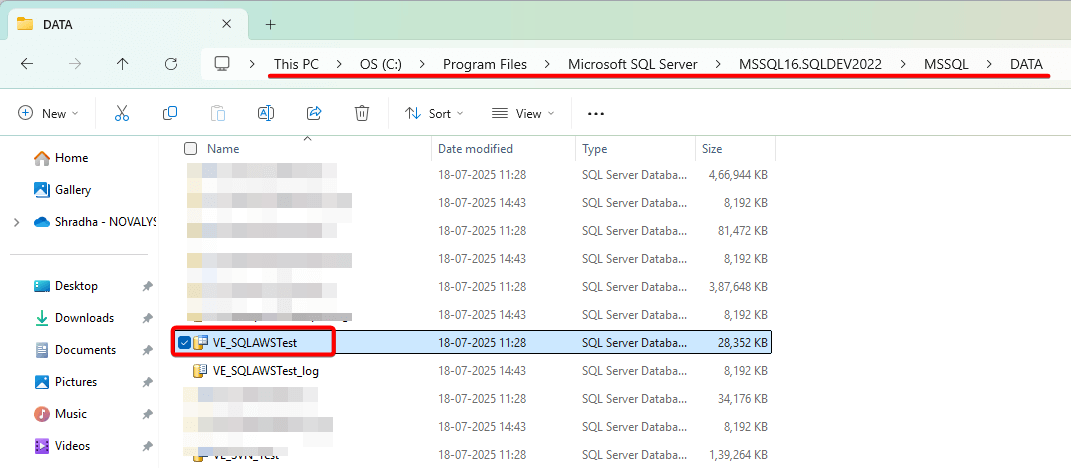
- Navigate to the file system path to confirm the files exist.
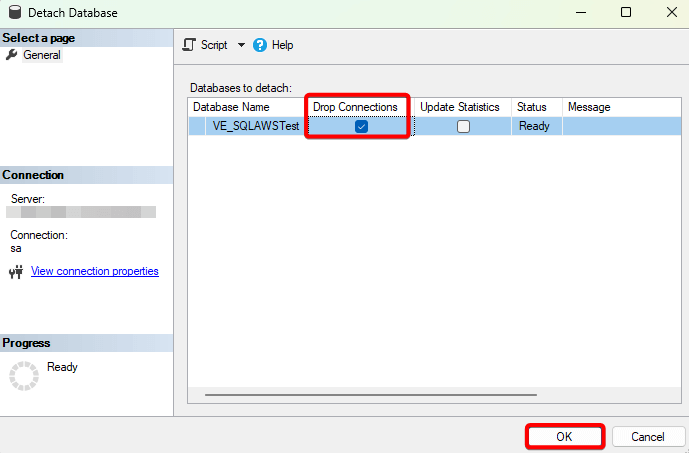
- In SQL Server Management Studio (SSMS), right-click the database → Tasks → Detach.
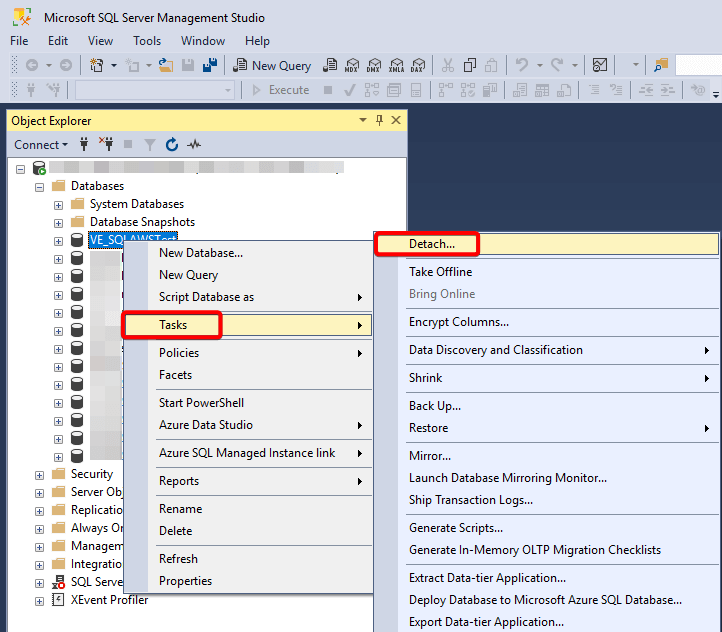
- In the dialog, check Drop Connections → click OK.
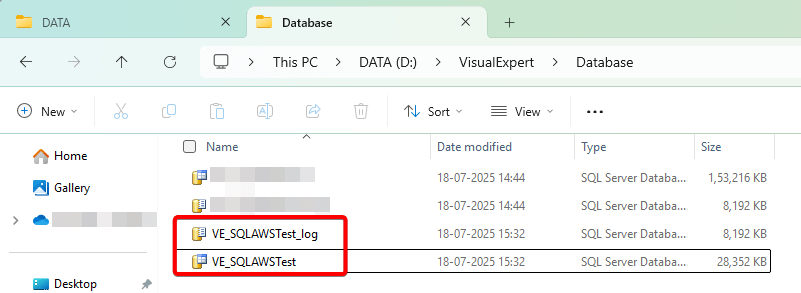
- Create a new folder in the desired location, then move the MDF and LDF files to this folder.
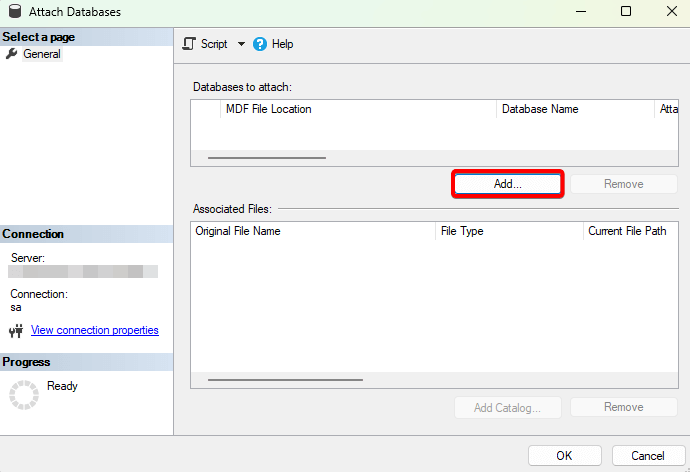
- In SSMS, right-click Databases → Attach.
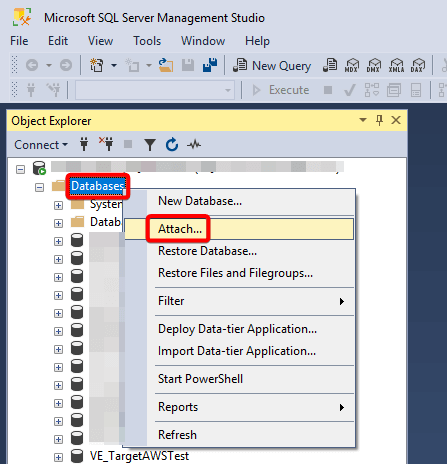
- Click Add to add the files to the desired location.
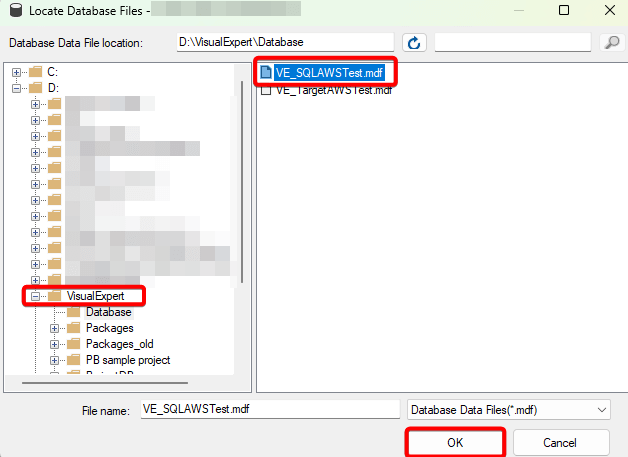
- Navigate to the new location, and select the MDF file → click OK.
- Confirm the database name and click OK again.
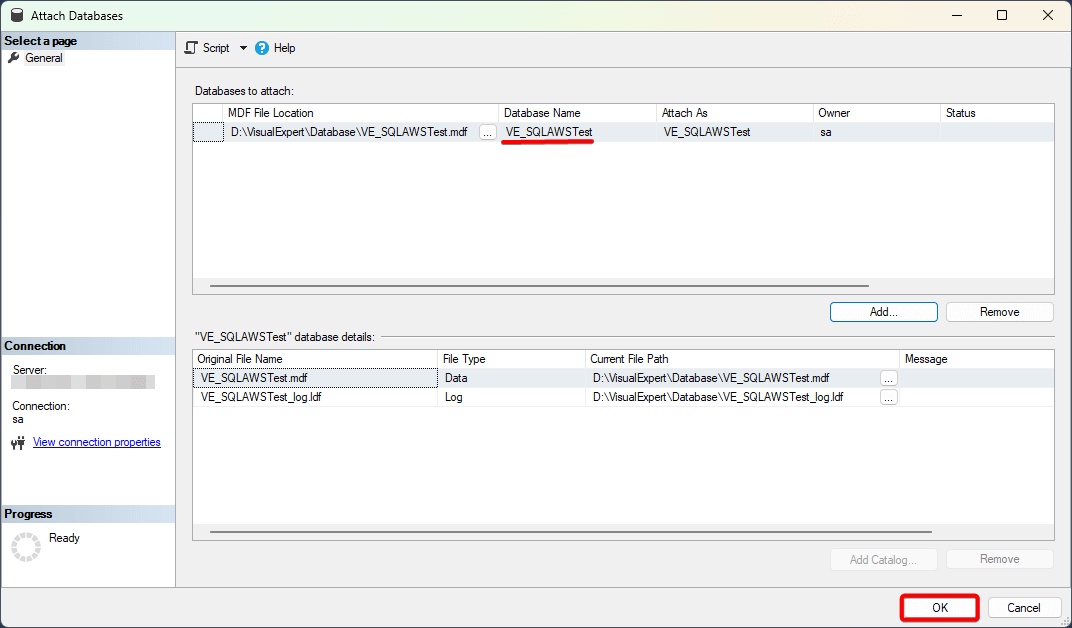
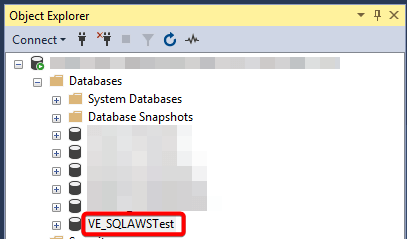
- Verify that the database appears in SSMS under the parent folder.
- Right-click the database → Properties → Files to confirm the new file path.
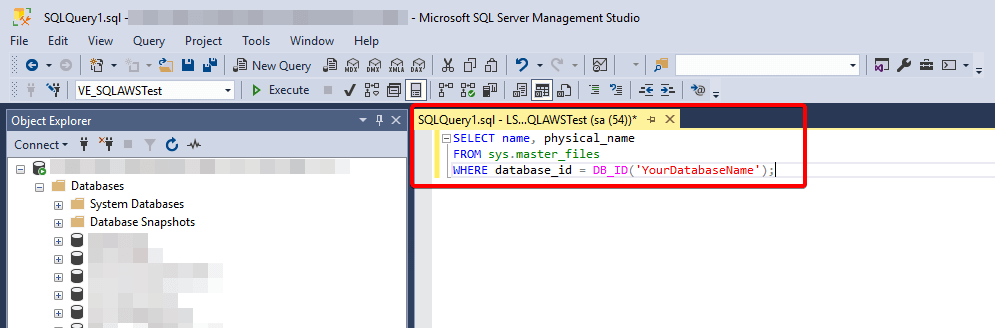
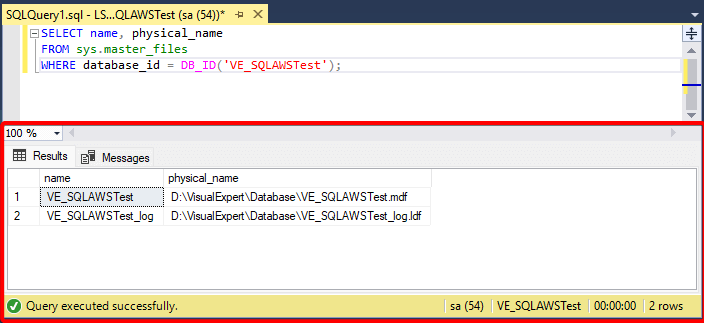
- Open a new query window.

- Execute a simple query on the database to validate access.

- Verify the results.
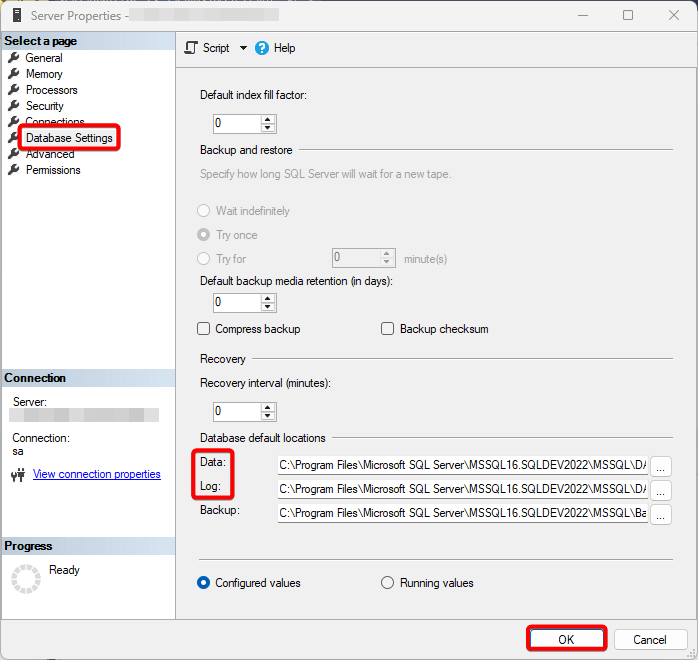
- Right-click the server → Properties.
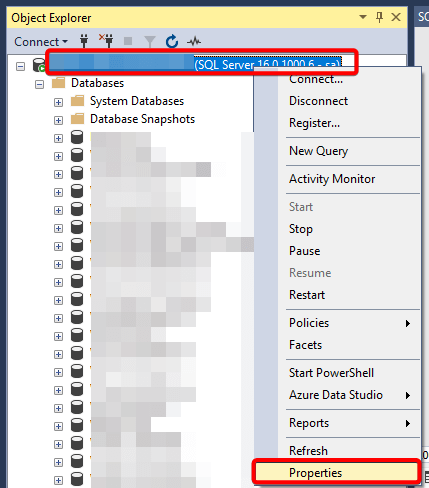
- Go to Database Settings, update the Default Locations for Data and Log files to the new location. Click OK.
Option 2: Move Files Using T-SQL Scripts in SQL Server Management Studio
- Set the database offline.
USE master; GO ALTER DATABASE <Project Database> SET OFFLINE; - Move the physical files (MDF and LDF) from the old location to the new folder.
- Alter project database and give new location for database and log file.
USE master; GO ALTER DATABASE <Project Database> MODIFY FILE (NAME = <Project Database>, FILENAME = 'D:\SQLDBs\MSQL\VE_DB\<Project Database>.mdf'); ALTER DATABASE <Project Database> MODIFY FILE (NAME = <Project Database>_log, FILENAME = 'D:\SQLDBs\MSQL\VE_DB\<Project Database>_log.ldf'); - Bring the database back online.
USE master;
GO
ALTER DATABASE <Project Database> SET ONLINE;
Example
If your database name is VE_demopfc:
-- Step 1: Take database offline
USE master;
GO
ALTER DATABASE VE_demopfc SET OFFLINE;

-- Step 2: Move files manually to new location

-- Step 3: Update file paths
USE master;
GO
ALTER DATABASE VE_demopfc
MODIFY FILE (NAME = VE_demopfc,
             FILENAME = 'D:\SQLDBs\MSQL\VE_DB\VE_demopfc.mdf');

ALTER DATABASE VE_demopfc
MODIFY FILE (NAME = VE_demopfc_log,
             FILENAME = 'D:\SQLDBs\MSQL\VE_DB\VE_demopfc_log.ldf');

-- Step 4: Bring database back online
USE master;
GO
ALTER DATABASE VE_demopfc SET ONLINE;
Final Notes
- Always verify database functionality after moving files.
- Ensure SQL Server has the necessary file system permissions for the new location.
- Update default database paths if you want new databases to use the new location automatically.