Explore, Analyze & Document your Code
How to Create a Visual Expert Project With PowerBuilder Code
This tutorial includes 3 steps:
Step 1 - Check the Requirements
Before you start:
- Download the latest build, and update your configuration.
- Verify that your key supports both PowerBuilder and ORACLE:
go to [Help - Info] - Check the "key features" in the right panel

If needed, read this article to request a new key
- Identify 1 set of PB code: 1 PB target OR 1 set of files/folders containing the PBLs
Step 2 - Add PowerBuilder code
- Go to [file – New Project]
- Select "PowerBuilder".

- Choose your PB version
- Specify the location of your PB code.
- Click "Next"
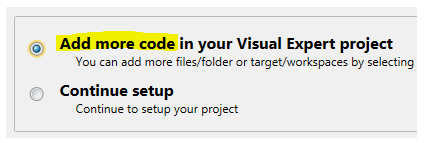
- Select "Add more code in your VE project".
- Name your Visual Expert project
- Set the scheduler to refresh your code analysis automatically on a regular basis
- Select "Launch the analysis"
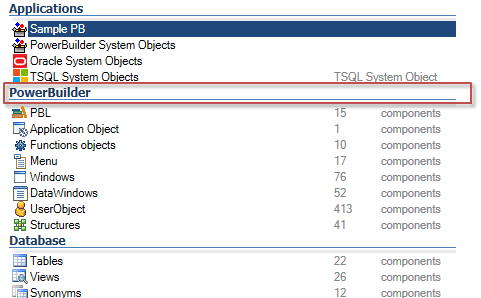
- After analysis, you will see the PowerBuilder objects in the treeview
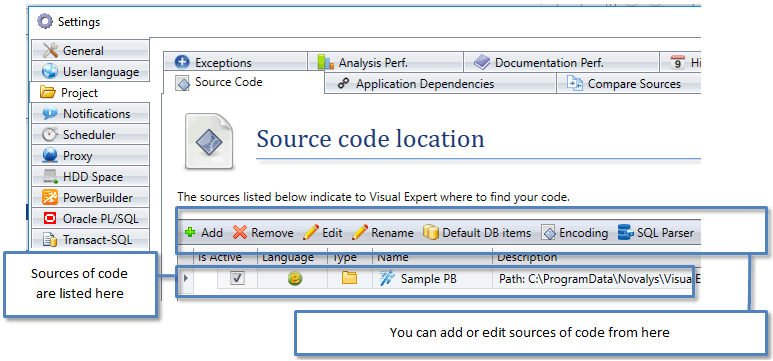
- You can see the source of code in your VE project.
Go to [Code Analysis - Select Source Code].
Step 3 - Remove ambiguities and duplicate tables
Why this step?
Select  firstname,  lastname  from  employee
Select  firstname,  lastname  from  myschema.employee
This basic example may create an ambiguity:
By default, the Visual Expert code parsers cannot know whether employee and myschema.employee refer to the same table.
Unless we remove this ambiguity, Visual Expert will duplicate the table employee.
Please read this article to remove possible ambiguities in your project.