This guide will help Visual Expert users to install SQL Server 2019 Developer edition.
Note: SQL Server is necessary to create the VE Repository and store code analysis data.
>> Download SQL Server 2019 Developer Edition
Once you have downloaded the .exe file, follow these steps to install and create an instance of SQL Server :
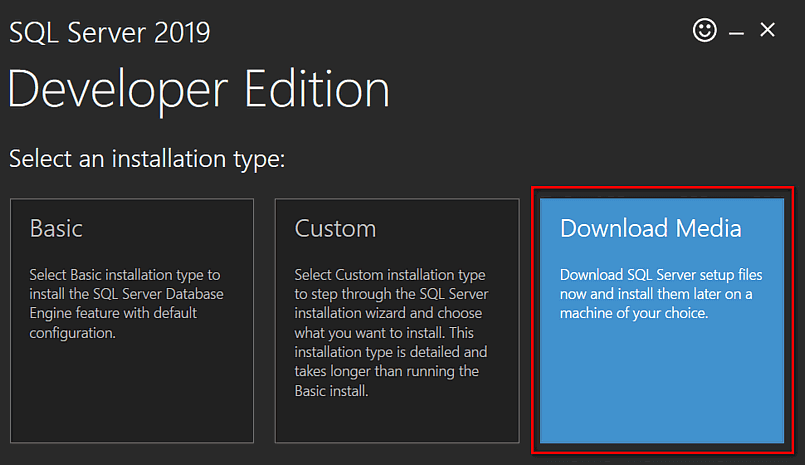
- Run the .exe file and choose "Download Media".
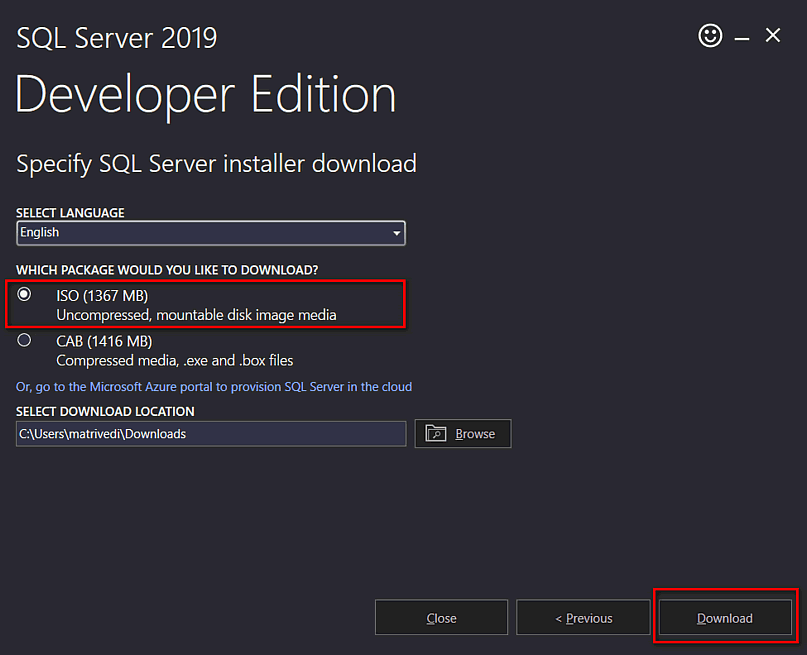
- Select your Language, choose the ‘ISO’ package and your preferred Download Location. Then, click on ‘Download’.
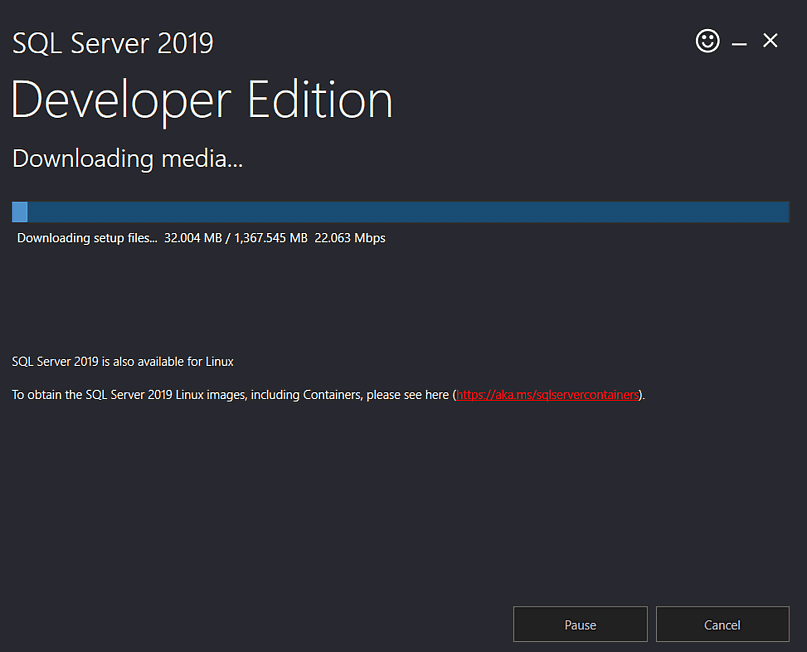
- The downloading process for the ISO package file begins.
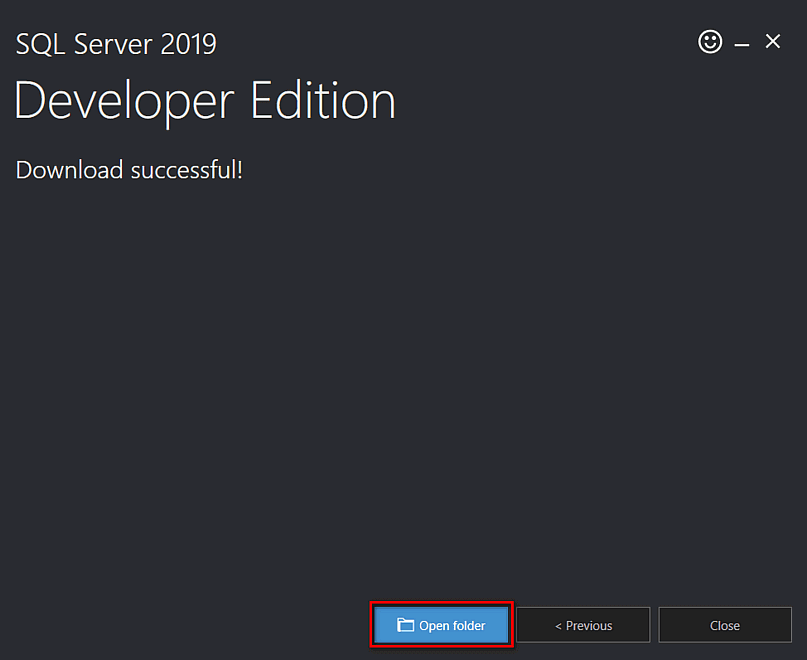
- On successful download, click on ‘Open Folder’ to locate the ISO file.
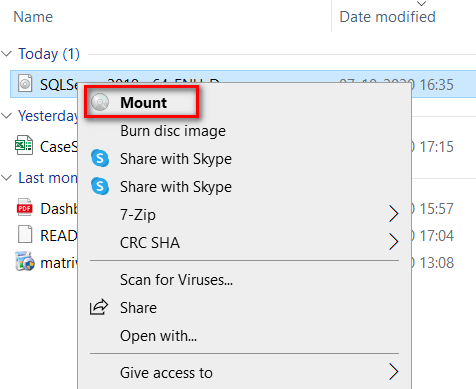
- Right click on the ISO file and click on ‘Mount’ to access the package files.
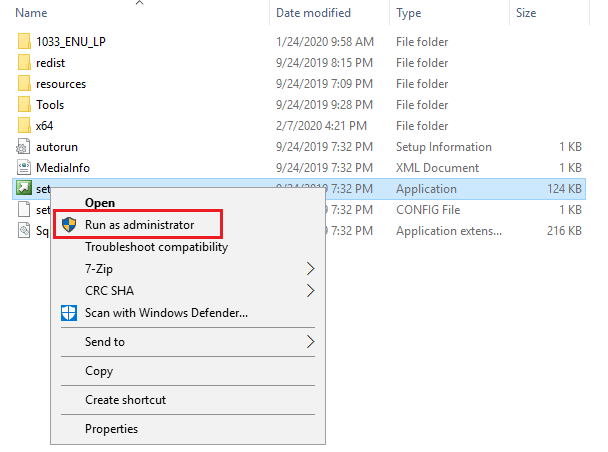
- Locate the installation package and setup file.

- Right click on the setup file, and select "Run As Administrator".
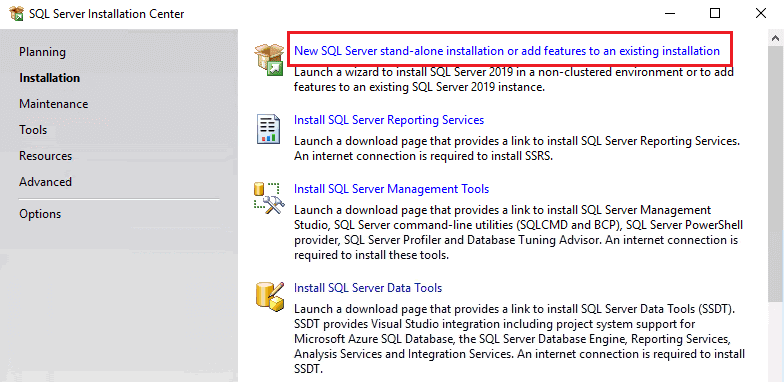
- The SQL Server Installation Center opens.
Select the first option:
"New SQL Server stand-alone installation or add features to an existing installation"
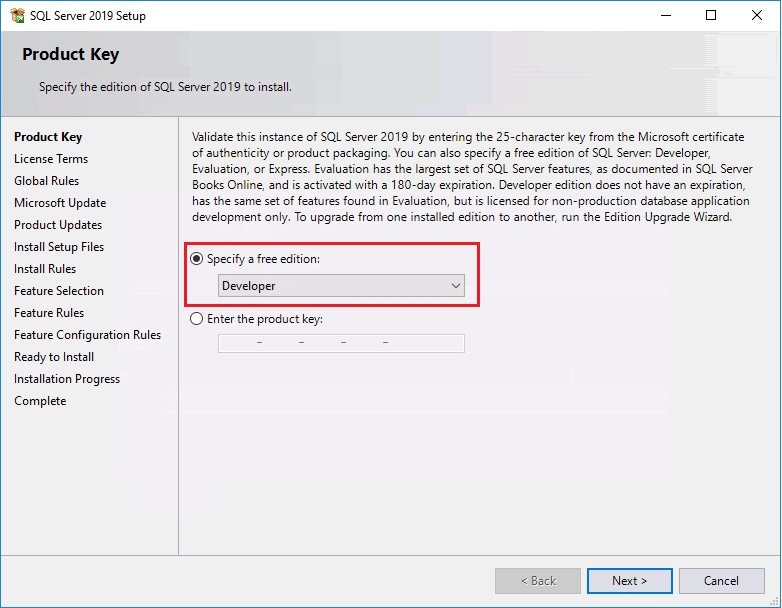
- In the "Product Key" section, choose the "Developer" edition and click on "Next".
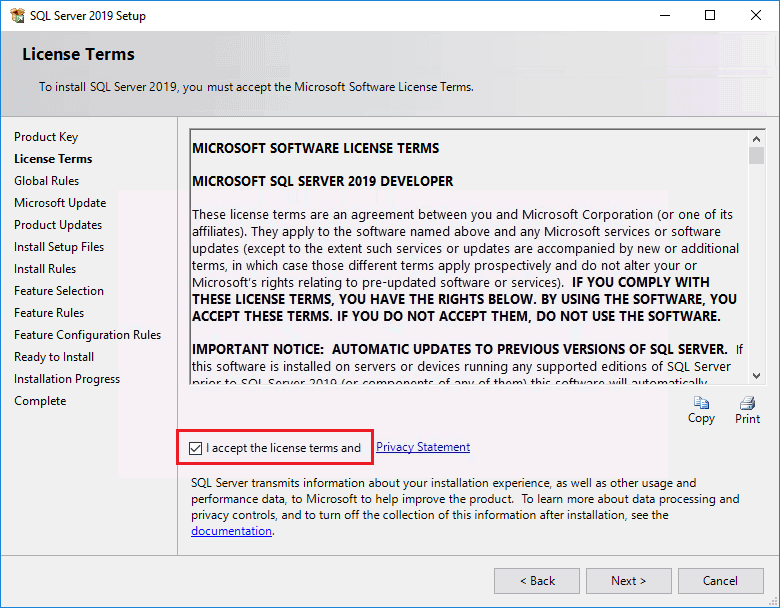
- Accept the license terms and click on "Next".
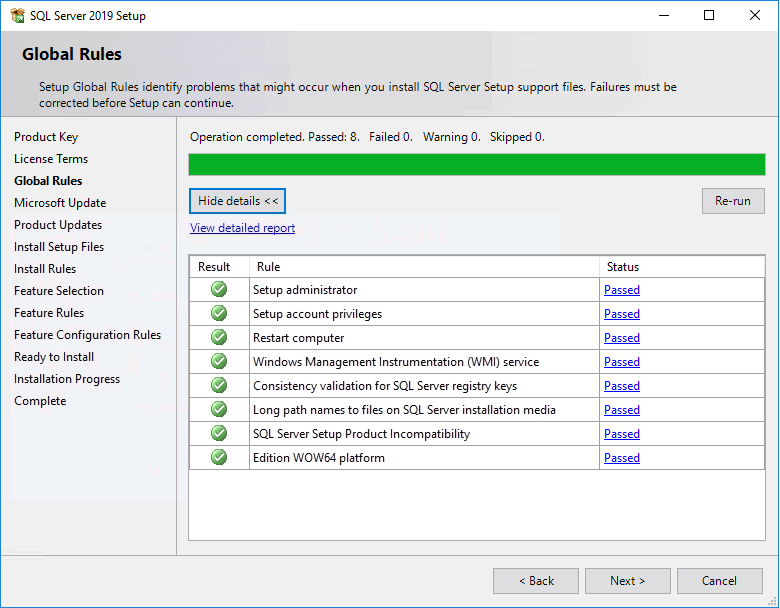
- Make sure all "Global Rules" pass the test and click "Next".
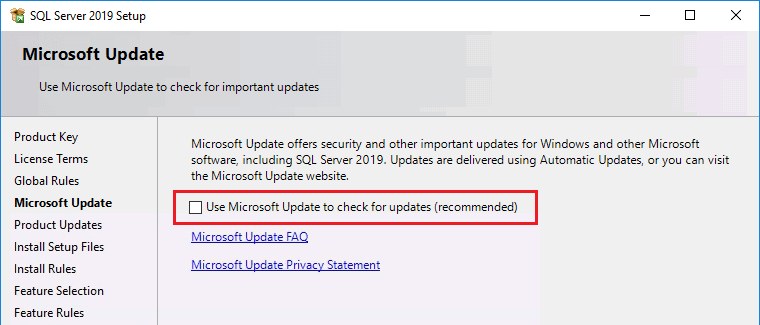
- In the "Microsoft Update" window, enable "Check for Updates" to allow the installer to automatically check for possible software updates.
Click on "Next".
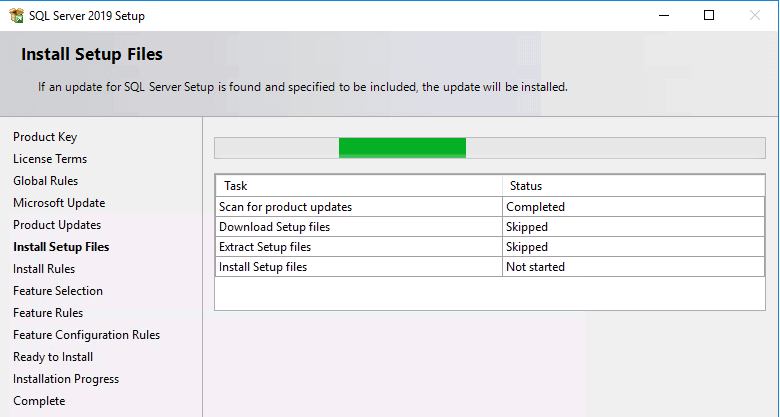
- The setup files will get installed in the next window - Install Setup Files.
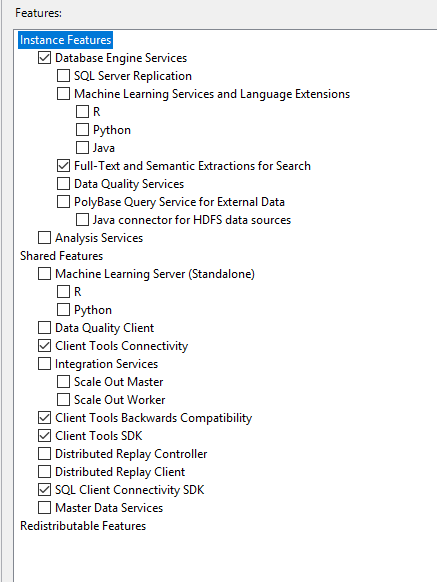
- The "Feature Selection" window allows you to select which SQL Server components will be installed.
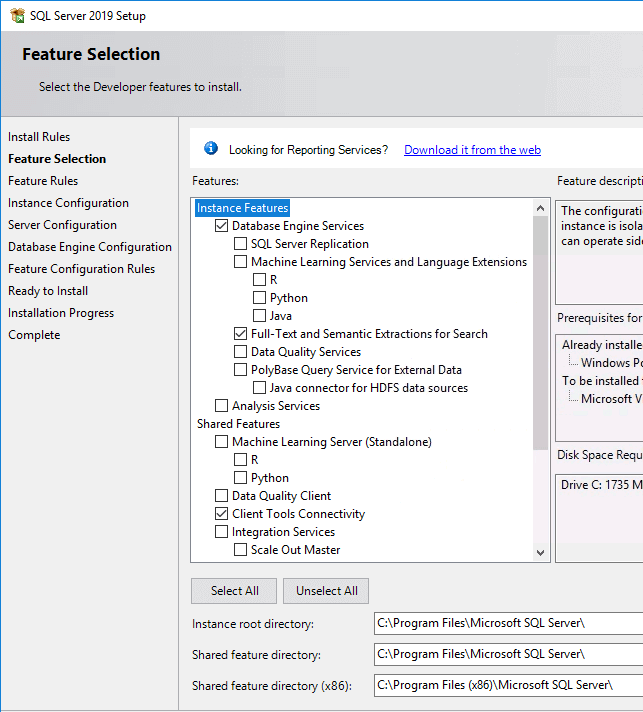
- Select the "Instance features" as shown below, as they are mandatory for SQL Server to work with Visual Expert. Then, click "Next".
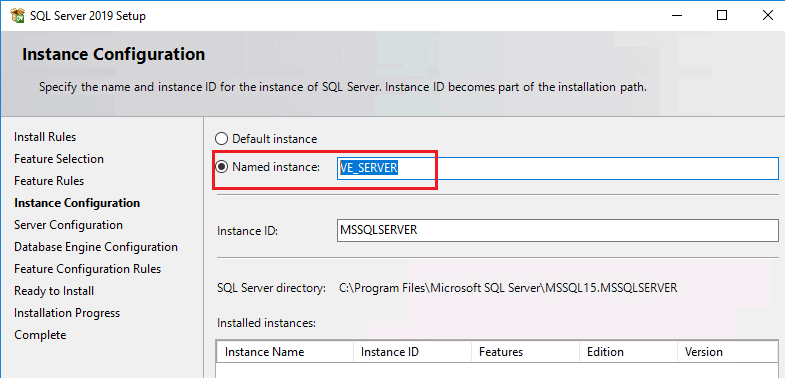
- In the "Instance Configuration" window, create a "VE_Server" Named instance and click "Next".
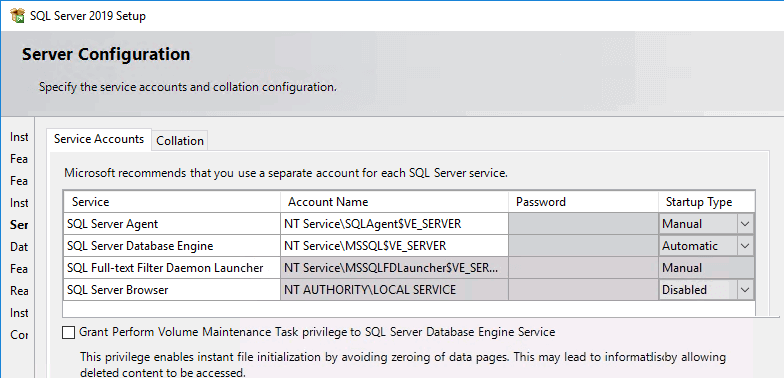
- The "Server Configuration" window allows users to configure Service Accounts.
Click "Next" if no change is required in the default account settings.
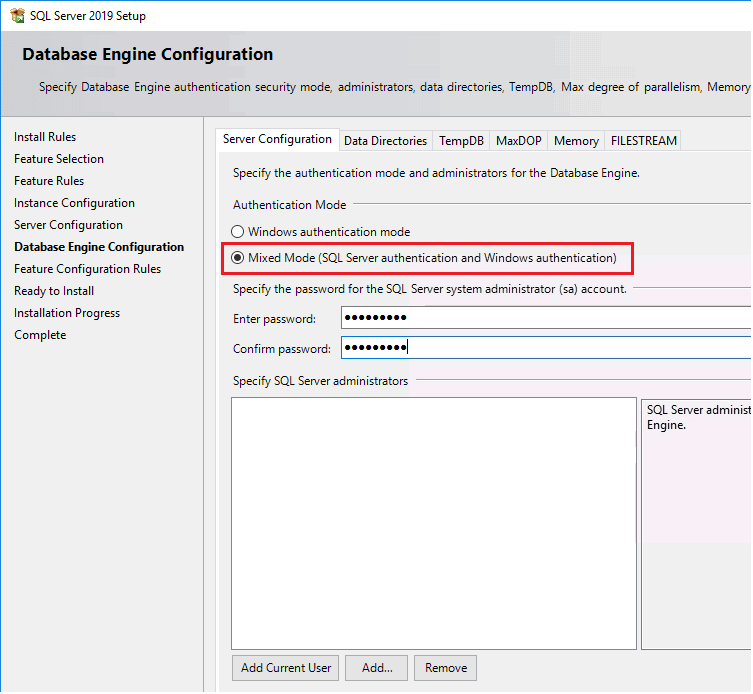
- In the Database Engine Configuration window, under the Server Configuration tab, select "Mixed Mode" authentication.
Doing so will allow you to set a password for "System Administrator (sa)" user.
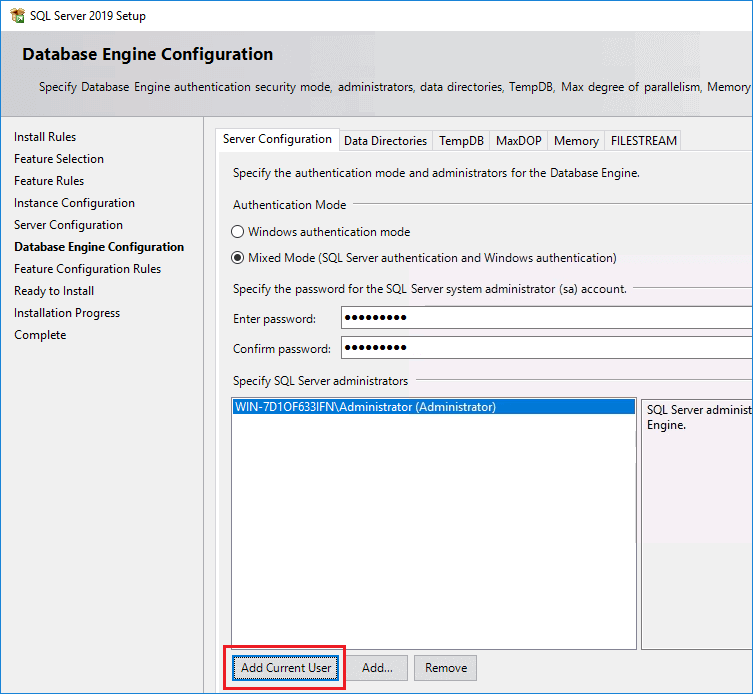
- Click on "Add Current User" to set the current user as Administrator for this SQL Server instance. Then, click "Next".
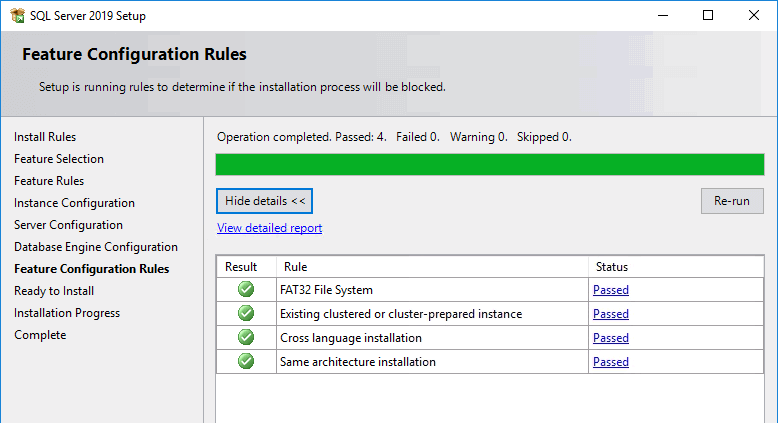
- Arriving at the 'Feature Configuration Rules' window, make sure all the Rule(s) pass the installer scanning test. Then, click 'Next'.
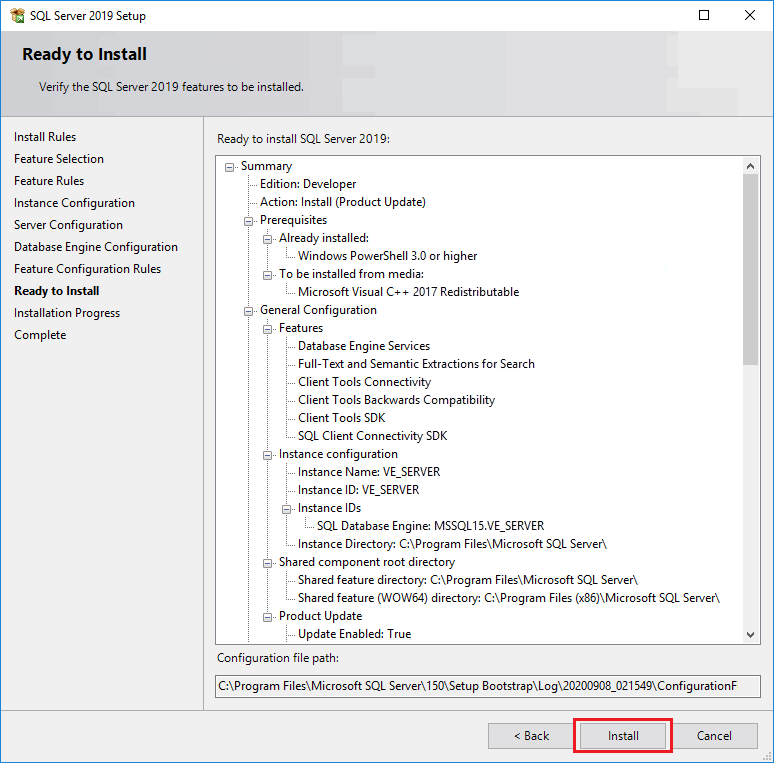
- All configuration steps have been completed. Click "Install" to start the installation.
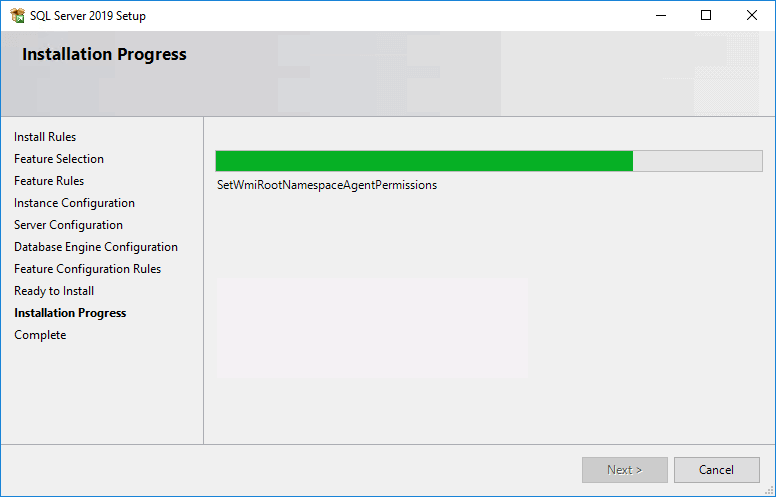
- The installation begins.
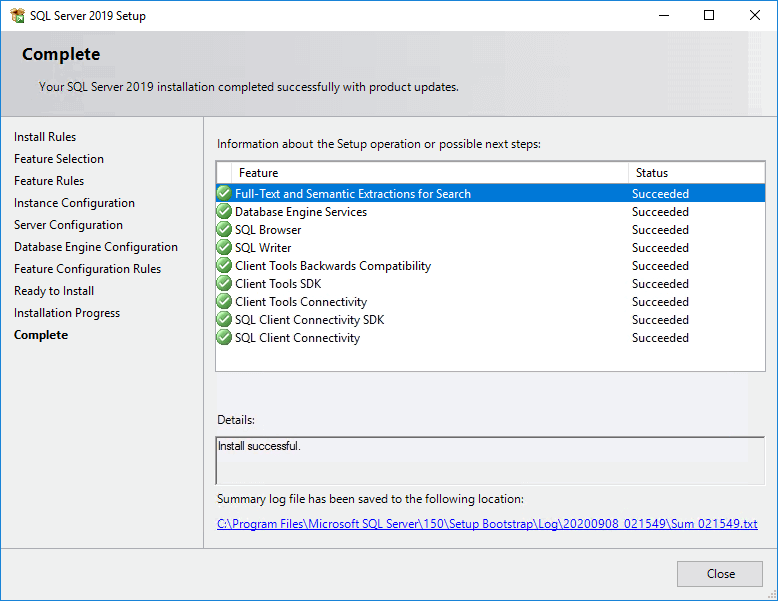
- The installation of SQL Server 2019 Developer Edition is completed.
Analyze your SQL Server T-SQL Code
Download Visual Expert Free Trial to Analyze Cross-References, Document your SQL Server Code, Generate Diagrams and CRUD Matrix, and much more.
Next Step
You can now Create your VE Repository and connect it with your SQL server instance.